CLAY PROJECTS FOR CHILDREN AGES 3-15

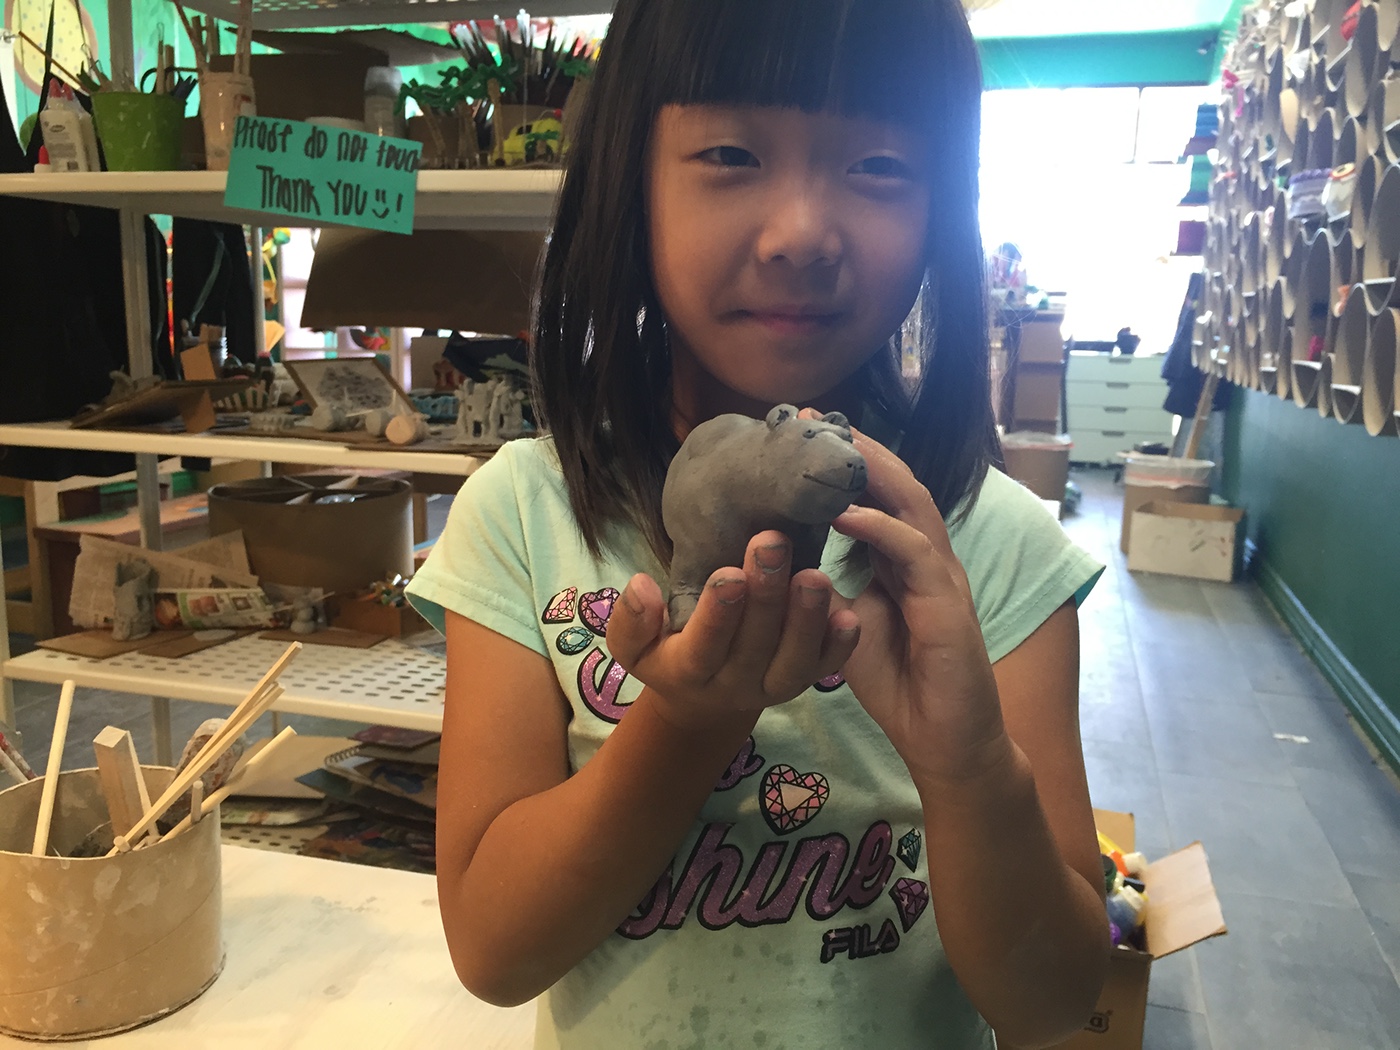
This is a sample of beginner through intermediate projects for the clay program I developed for "Little Artist Lab". The little round house in the center of the image is one of the basic projects I developed for the younger children in the program. They range from ages 4-5. It consists of making a basic ball shape cut in half and poking holes for windows, carving out a simple doorway with the wooden clay knife. Then adding a little chiminey made by rolling a small ball of clay into a small cylinder, then using a piece of toothpick to attach it to the round "house" form and poking a hole wirh a rubber poker. Although very basic, it envolves several techniques that introduce the young children to a process of construction that is consistent throughout my clay coriculum. Next are the square houses project. This is for slightly older boys and girls for ages 4-7. It requires a little more manual dexterity in making a cube from a ball or sphere, using spatulas and/or the surface of the table to flatten the ball into a cube. The roof is made by rolling a thin sheath of clay and then cutting with either spatula or wooden clay knife and then attaching them to the cube by using slip. The windows and doors detail are simply carved with a thin wood clay knife. The chimney is almost the process same as the round house's, except the small cylinder is also converted into a rectangle by using spatulas or clay knife and then attached with slip and toothpicks. The Cylindrical towers are the next projects for slightly more experienced kids ages 4-7. They require a little more manual dexterity to roll a larger more perfect cylinder out of a ball, using hands and/or spatulas, which ever the child feels more comfortable with. I encourage the student to try both techniques to train themselves to master hand control and tool control. The roofs are also a bit more challenging because it requires pinching a ball of clay but only on one end to create the cone shape in the case of the cylinder towers. In the case of the rectangular house, the roof is triangular. It is achieved by shaping a cube or rectangular quadrilateral and then cutting it in half. Then the tile detail is carved with a pointed clay tool. This is a good exercise for steady hand control, as well as a lesson in geometry. The edge of the clay spatula can also be used to achieve the effect. I again encourage students to try both techniques to enrich their experience and develop dexterity. Once the 4-7 students get more comfortable with this process, I introduce the "Kitchen Project". As the young sculptors get better at generating and giving shape to the various geometric forms, they discover how most objects in daily life are geometrical in nature. First the room with 3 dimensions is made from cutting 3/4 " slabs of clay and glued together with slip using a wooden base. Then they are free to fill the room with any appliance they choose, thus allowing the child's personal creativity to come into play! It is very interesting to see how each student's personality and experience play out in the creation of objects that fill their individual rooms. This project is also for the entire house. I have made a variety of rooms including: Kid's Room, Living Room, Bathroom, Play Room and other rooms of the house projects. The "School Bus" and the "Speed Boat" projects are the next level up. I recommend these two projects for children ages 5-9. They consist of the same basic geometric shapes techniques described above, but taken a little further. The "Airplane" and "Fire Truck" projects are the next projects and these are for children 6-10. Again, the process is the same but taken to the next level in creating more realistic detail. For these two projects I introduce some basic drawing techniques for the side, front and top views of the vehicles to help the students understand basic principles of design. The same goes for the "Big House" project which is a more ellaborate version of the little houses project.


Kitchen Project Detail

"BABY TURTLE PROJECT"
Sculpture project foe students ages 6 -11


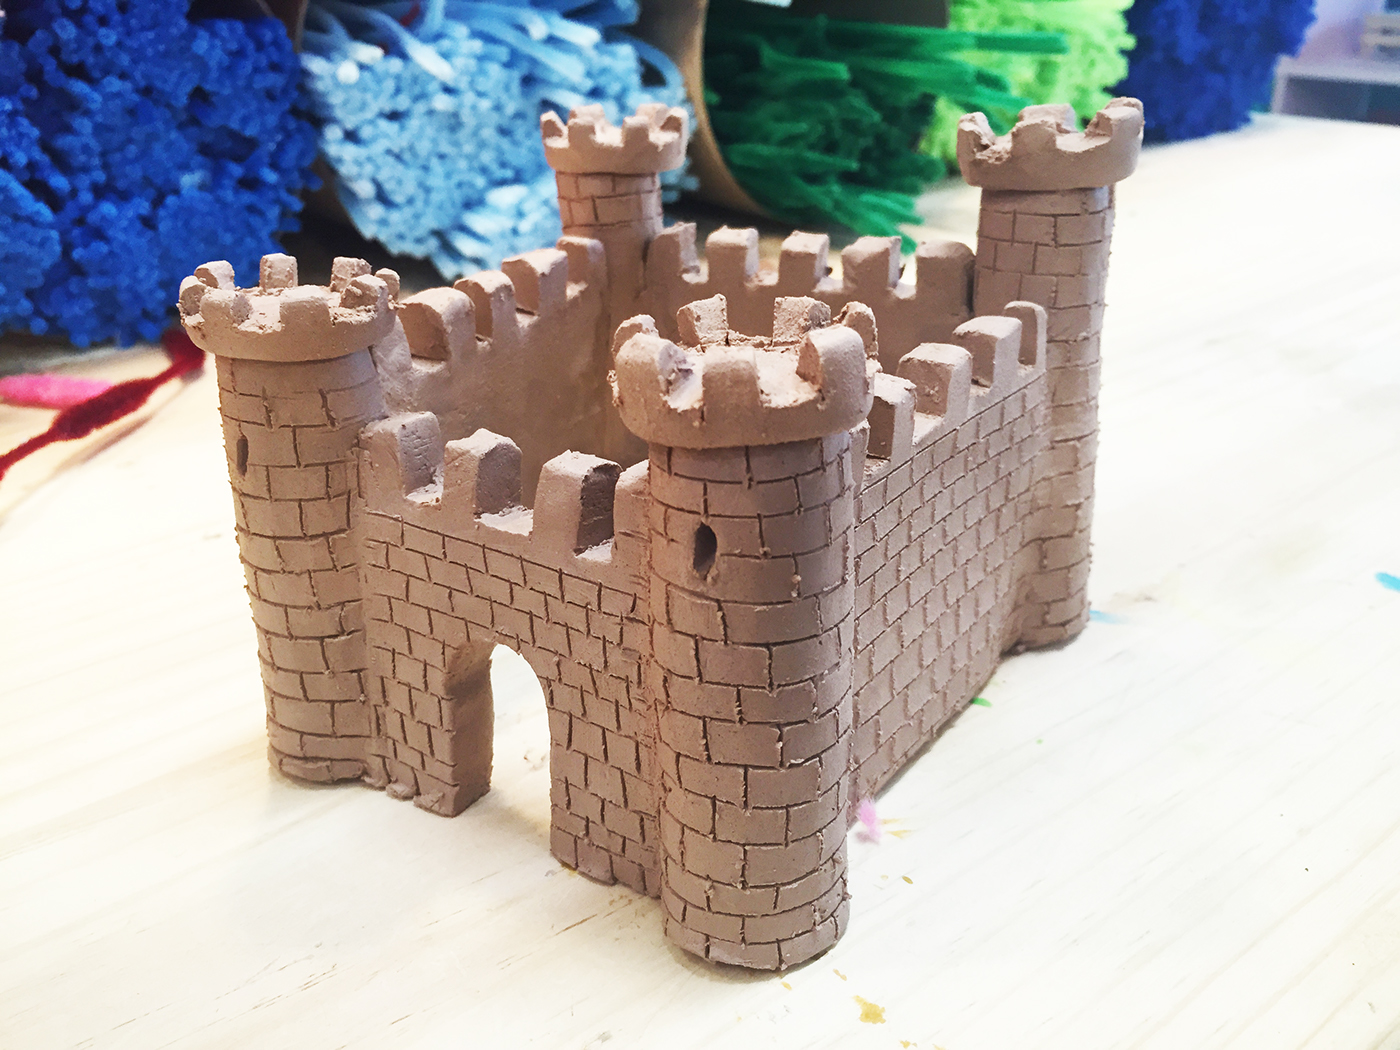
Castle Project
This project was developed for two, two hour sessions for students ages 6-12. I broke down the project to be somewhat simple, yet still challenging. The basic pieces and their construction process is not really difficult, but the chance to really develop detaling techniques is as vast as the student is willing to undertake. The assembly is the most challenging aspect of the project. The project begins by rolling out 1/4" slab of clay with a rolling pin and then cutting it into four rectangular parts of equal size of roughly 2 1/2" x 4". Secondly the students make a clay ball about 1 1/2" x 1 1/2 " into a cylinder by hand or with the aid of a spatula. Then the students roll another smaller ball of about 1/2" x 1/2" and then make a short stubby drum shape. The next step requires that the students use the same slab of clay of 1/4" thickness to cut little square shapes. Roughly around 16 squares to be used for the intermittent top bricks of the walls of the castle and then another 16 to 20 square pieces for the bricks of the towers. Once all the pieces are cut and sculpted the assembly stage begins. Using thin sticks or matches to connect the wall pieces to the tower pieces and then also using slip to re-enforce the bonds between the edges of walls and towers. Then the little bricks are bonded to the walls with match sticks and slip. Next, the drum pieces are connected to the cylinders to form the top of the towers. Next one of the walls is cut into a 2 1/2" x 3" wall to serve as the front wall of the castle. Then the front gate is cut out of the wall with a clay knife. Finally, after all the pieces have been connected, a pointed clay tool is used to "draw" or carve the brick details into the walls and towers.


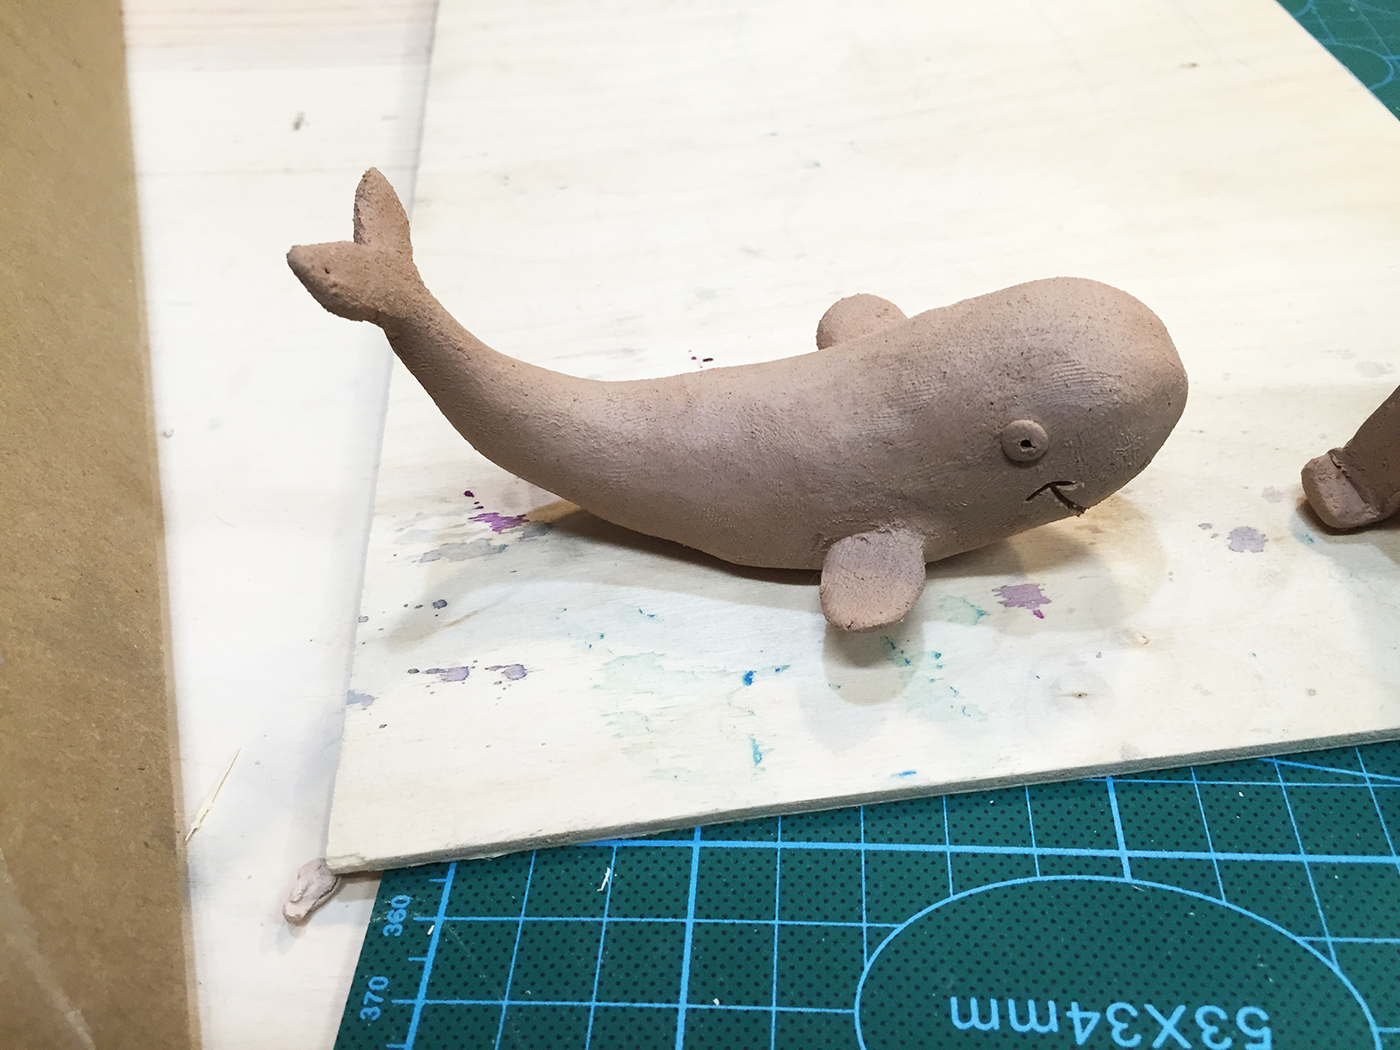
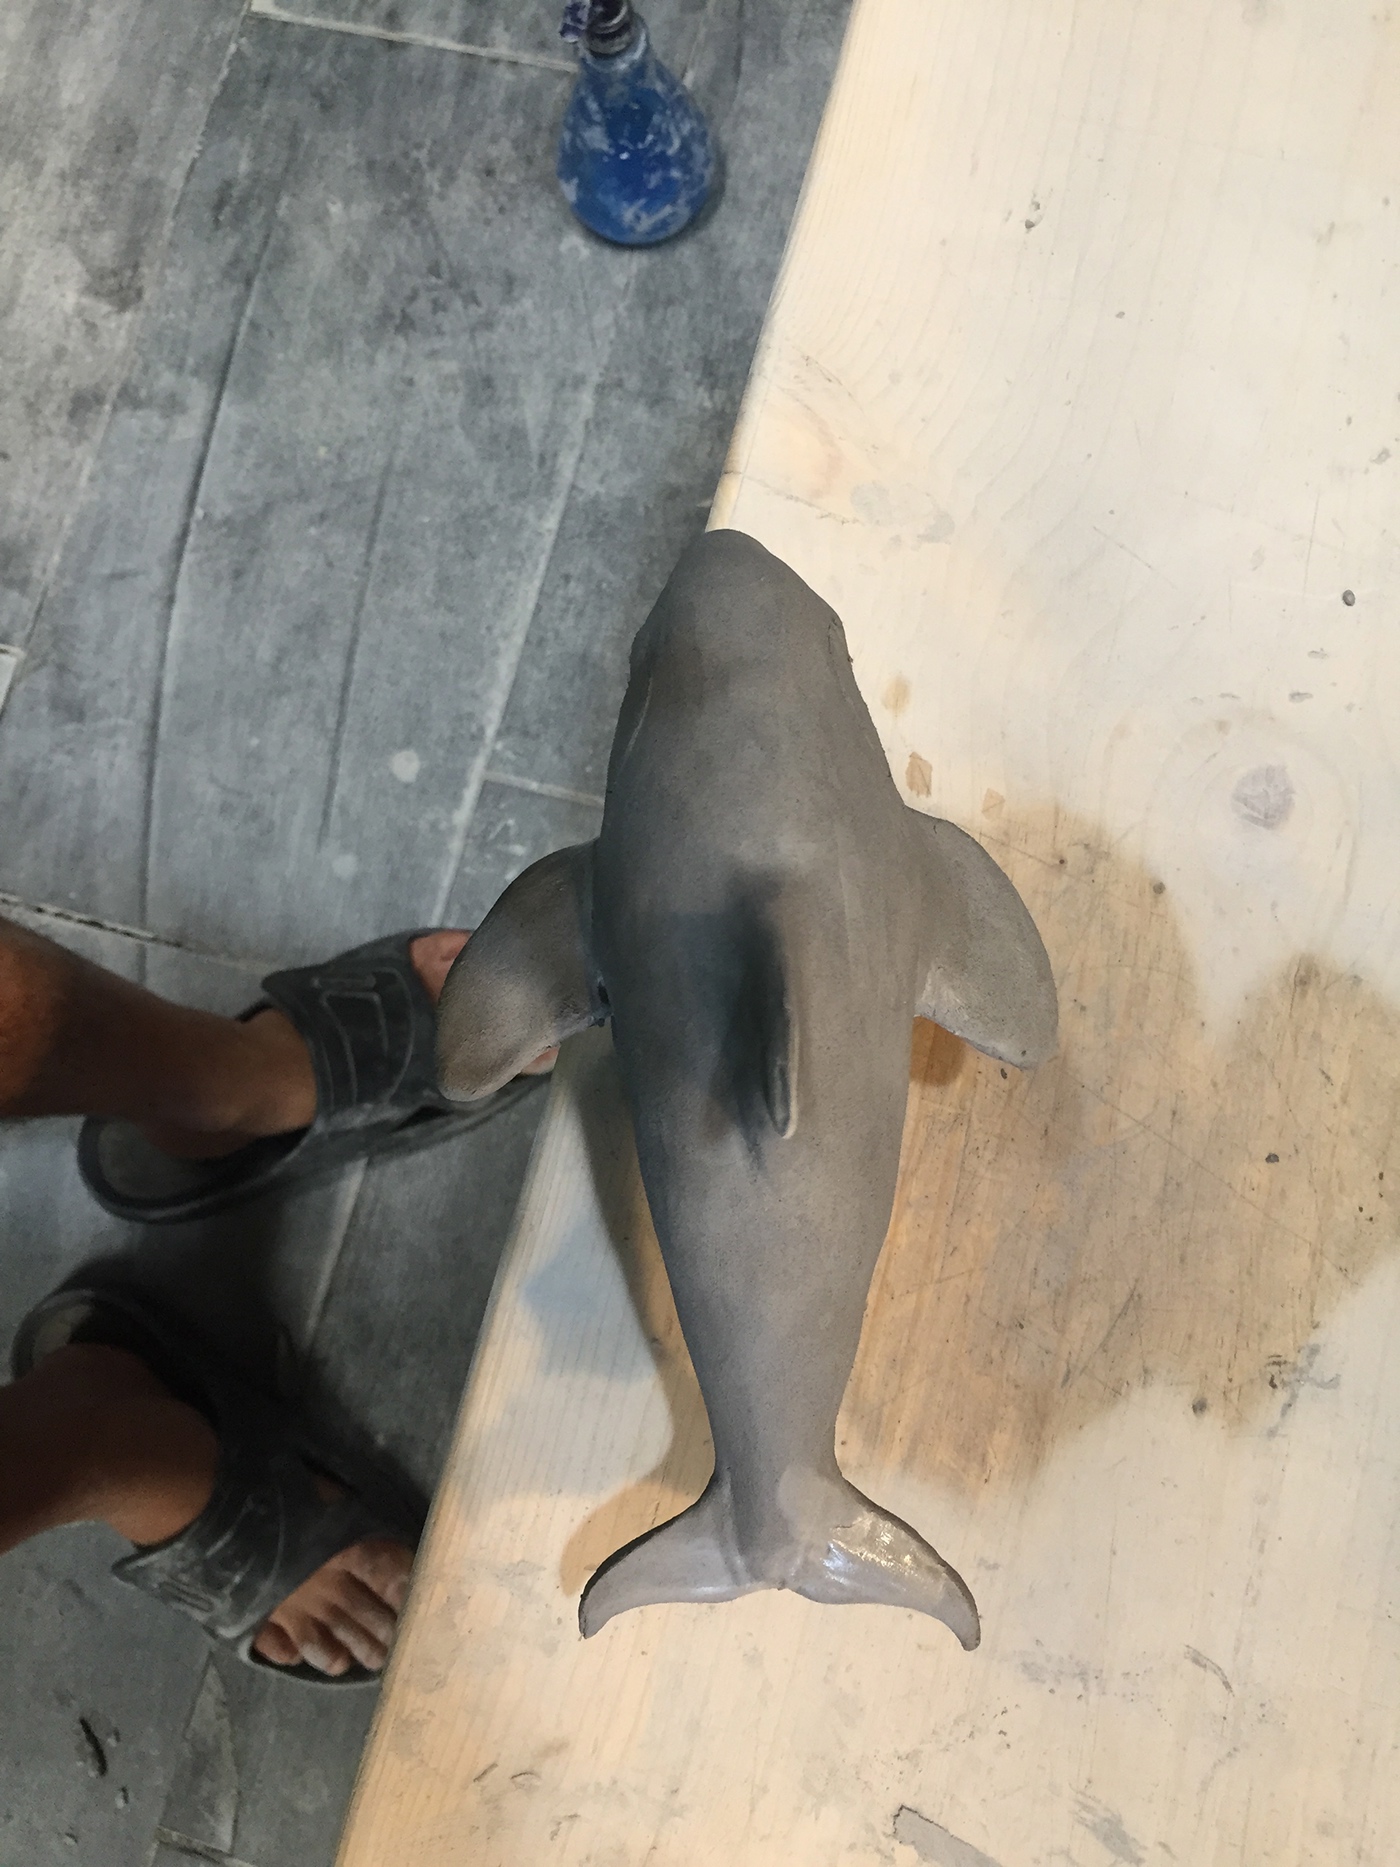
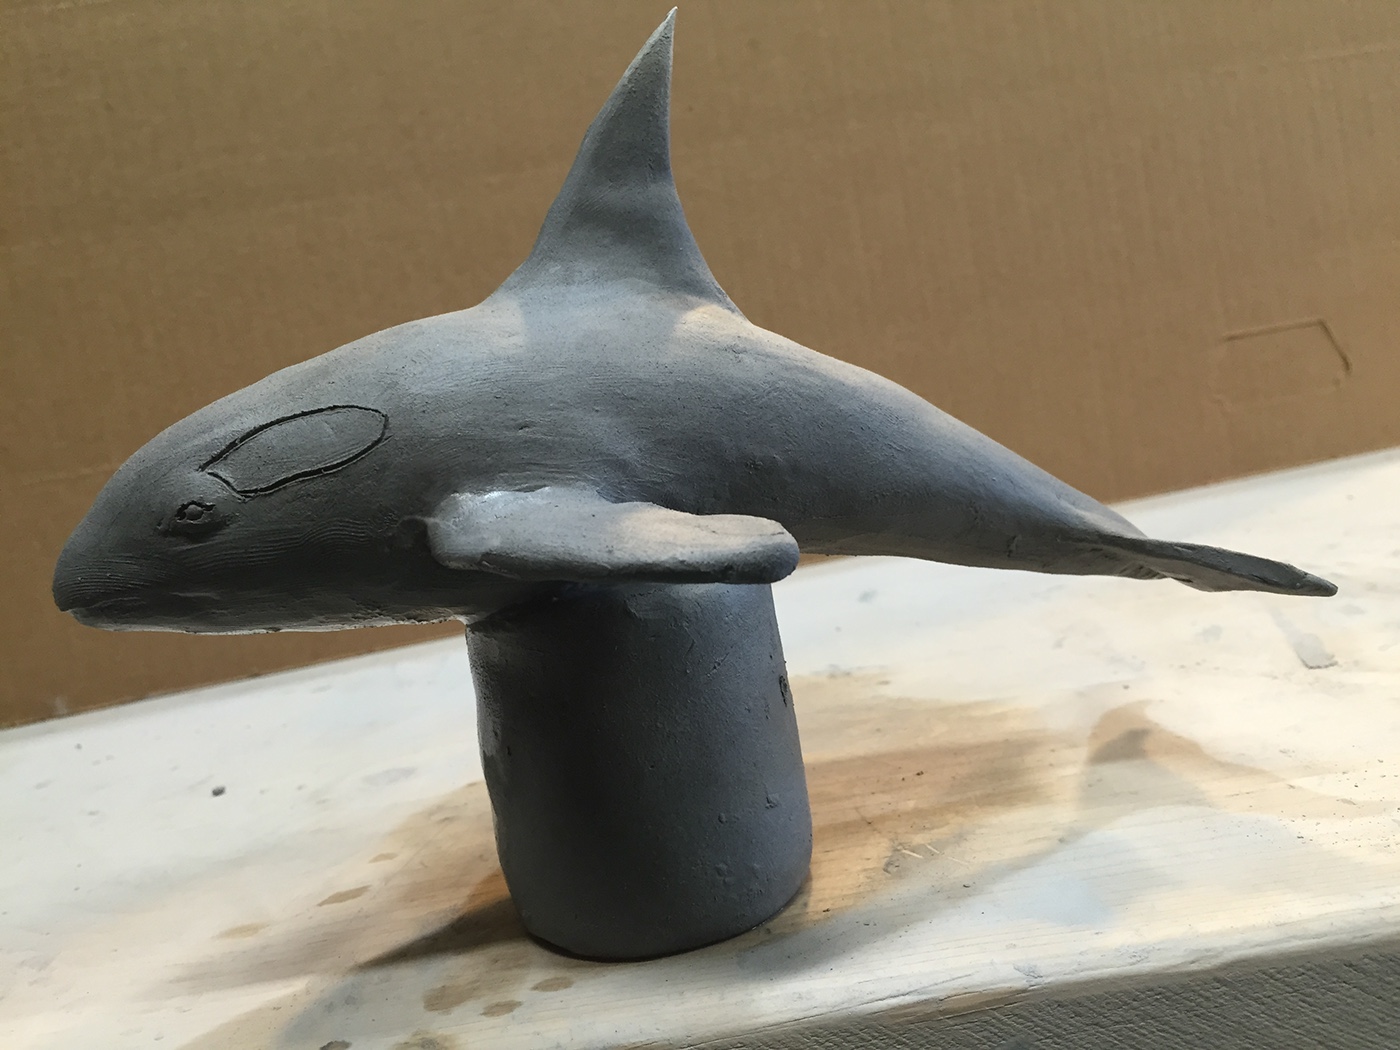
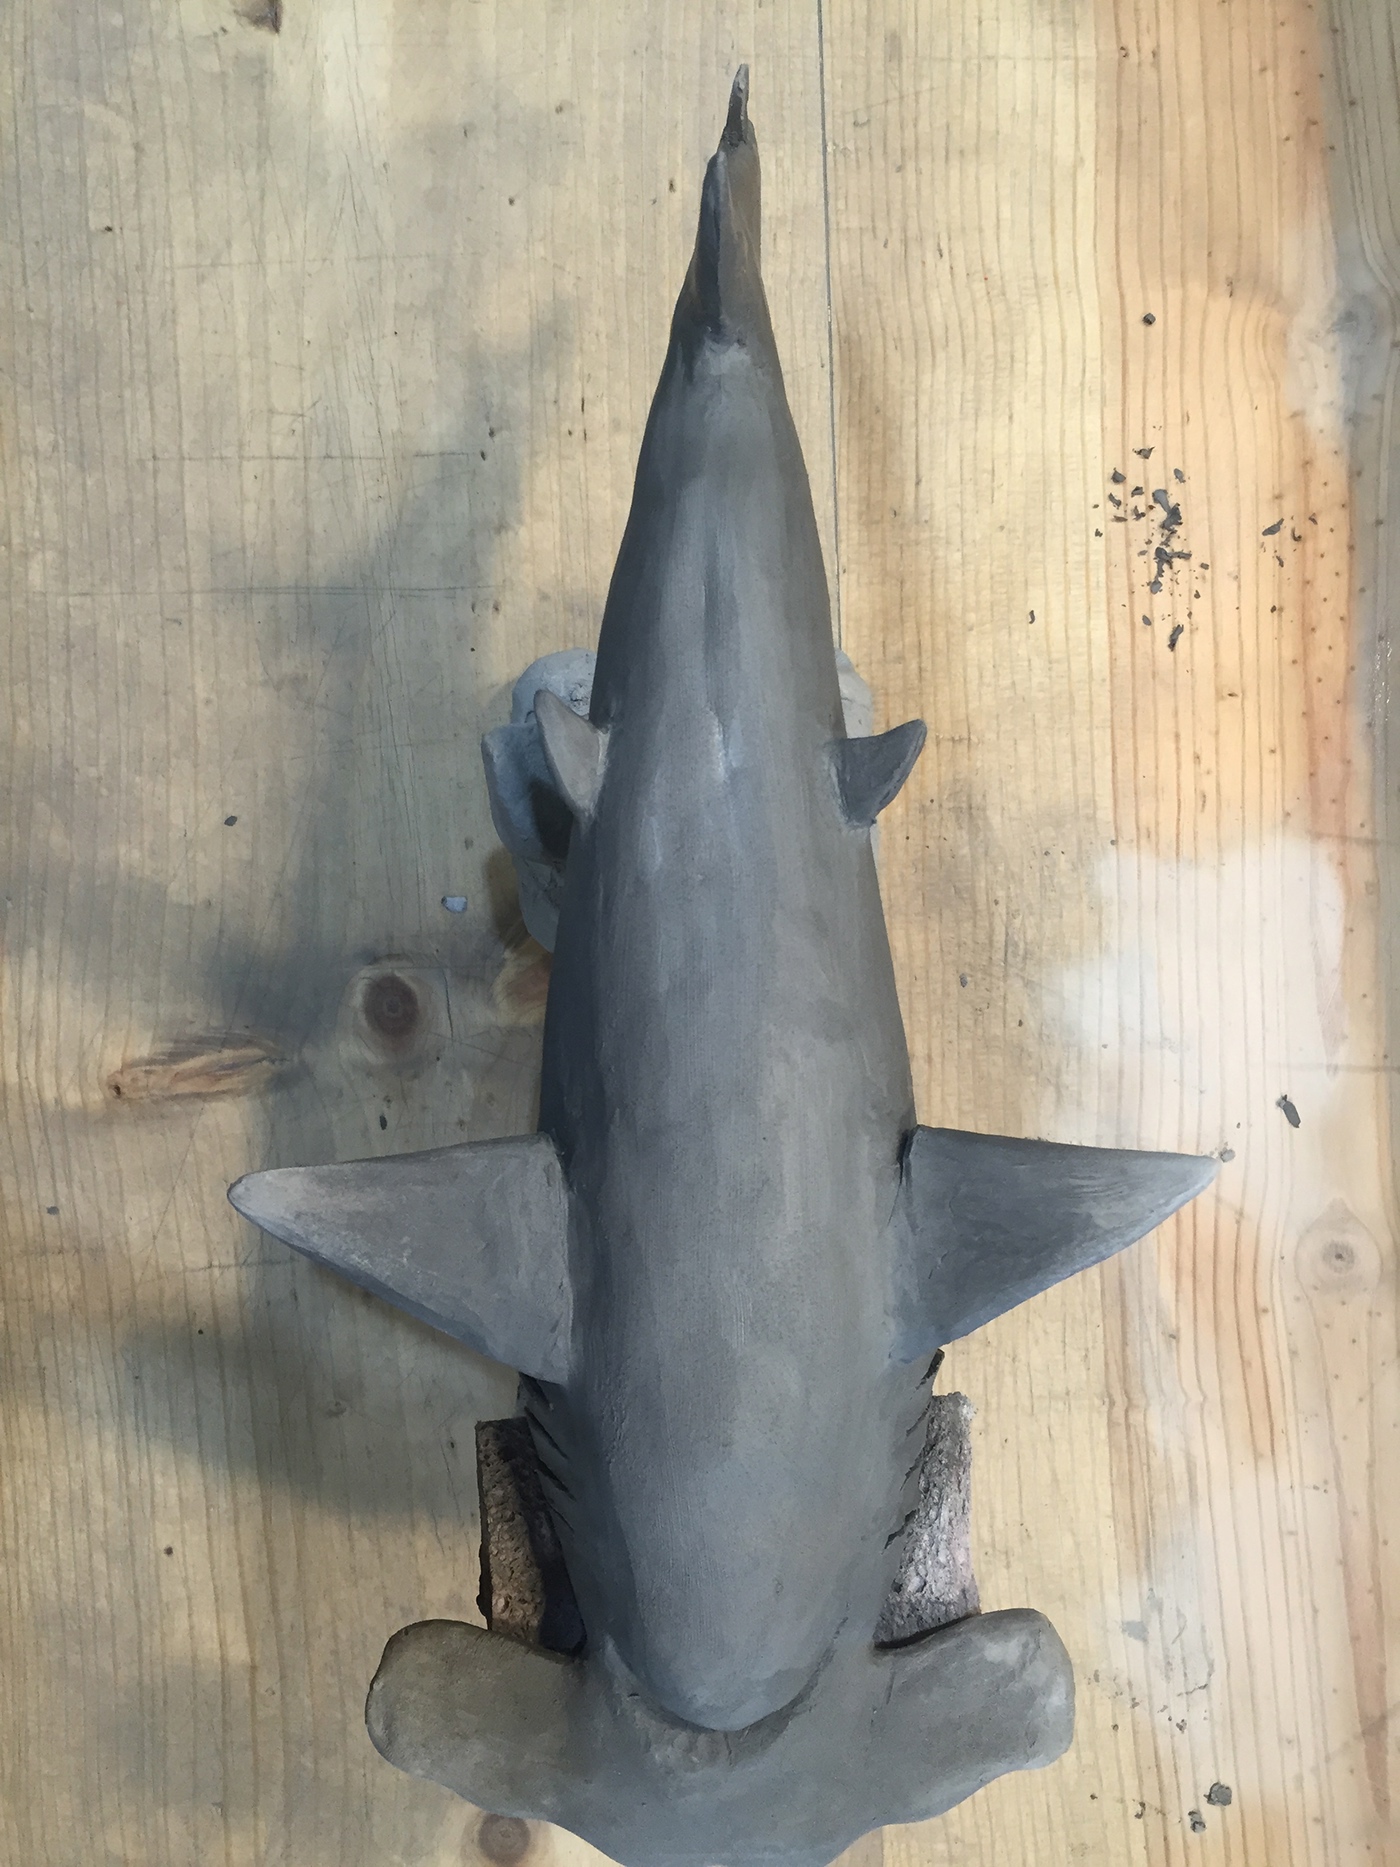
"Little Whale Project"
This is a beginner to intermediate project for children ages 4-7
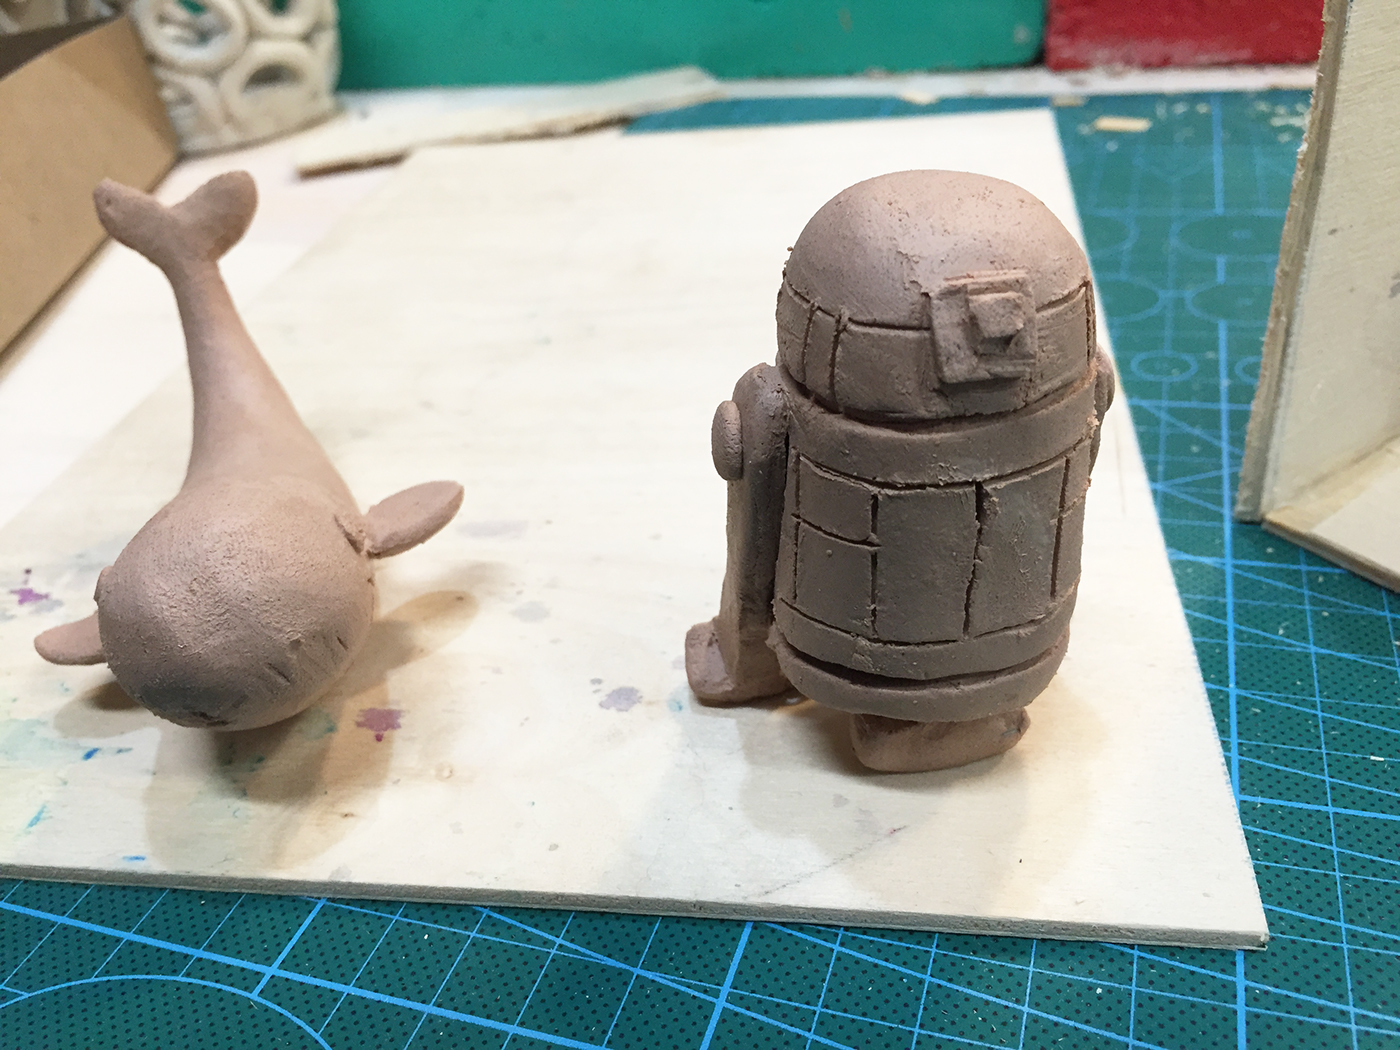
Front view for "Little Whale" and "R2-D2" project.
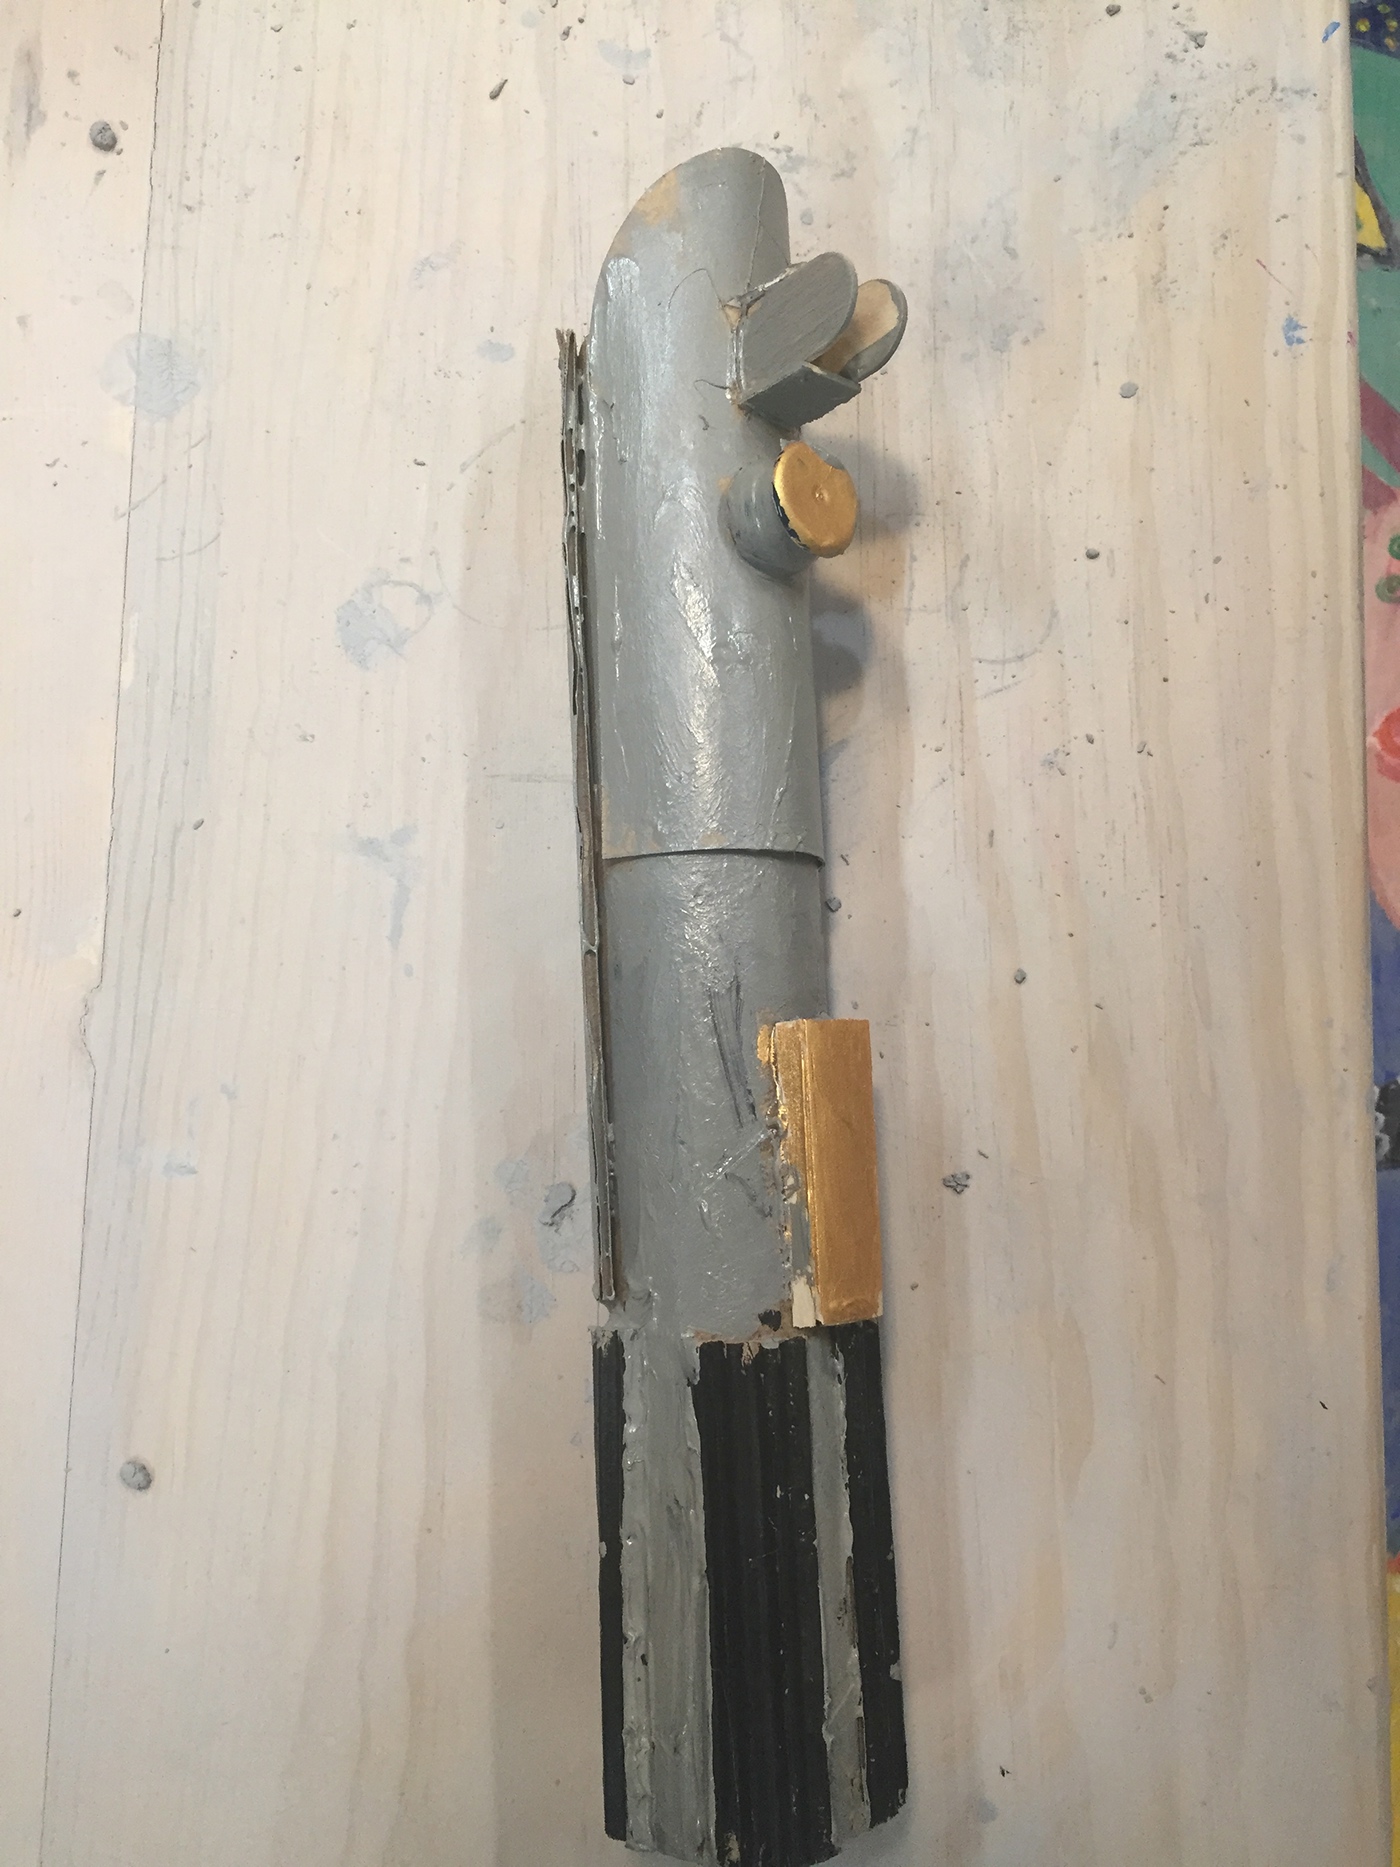
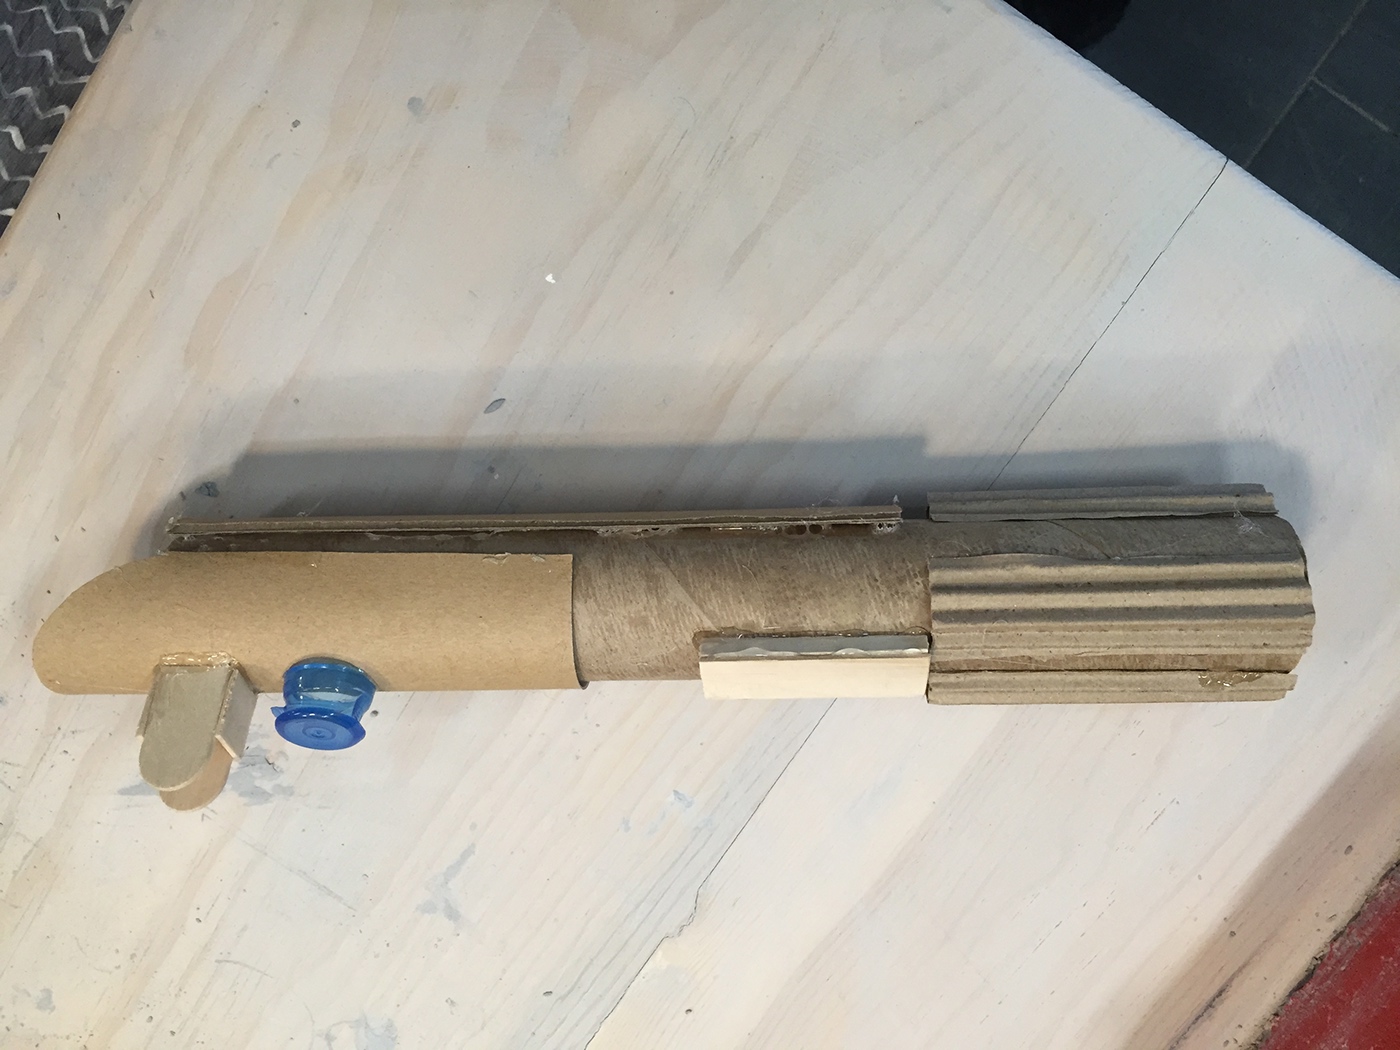
The R2-D2 Project is for advanced children ages 7-15 because it requires a lot of detail work as well as fragile parts construction.
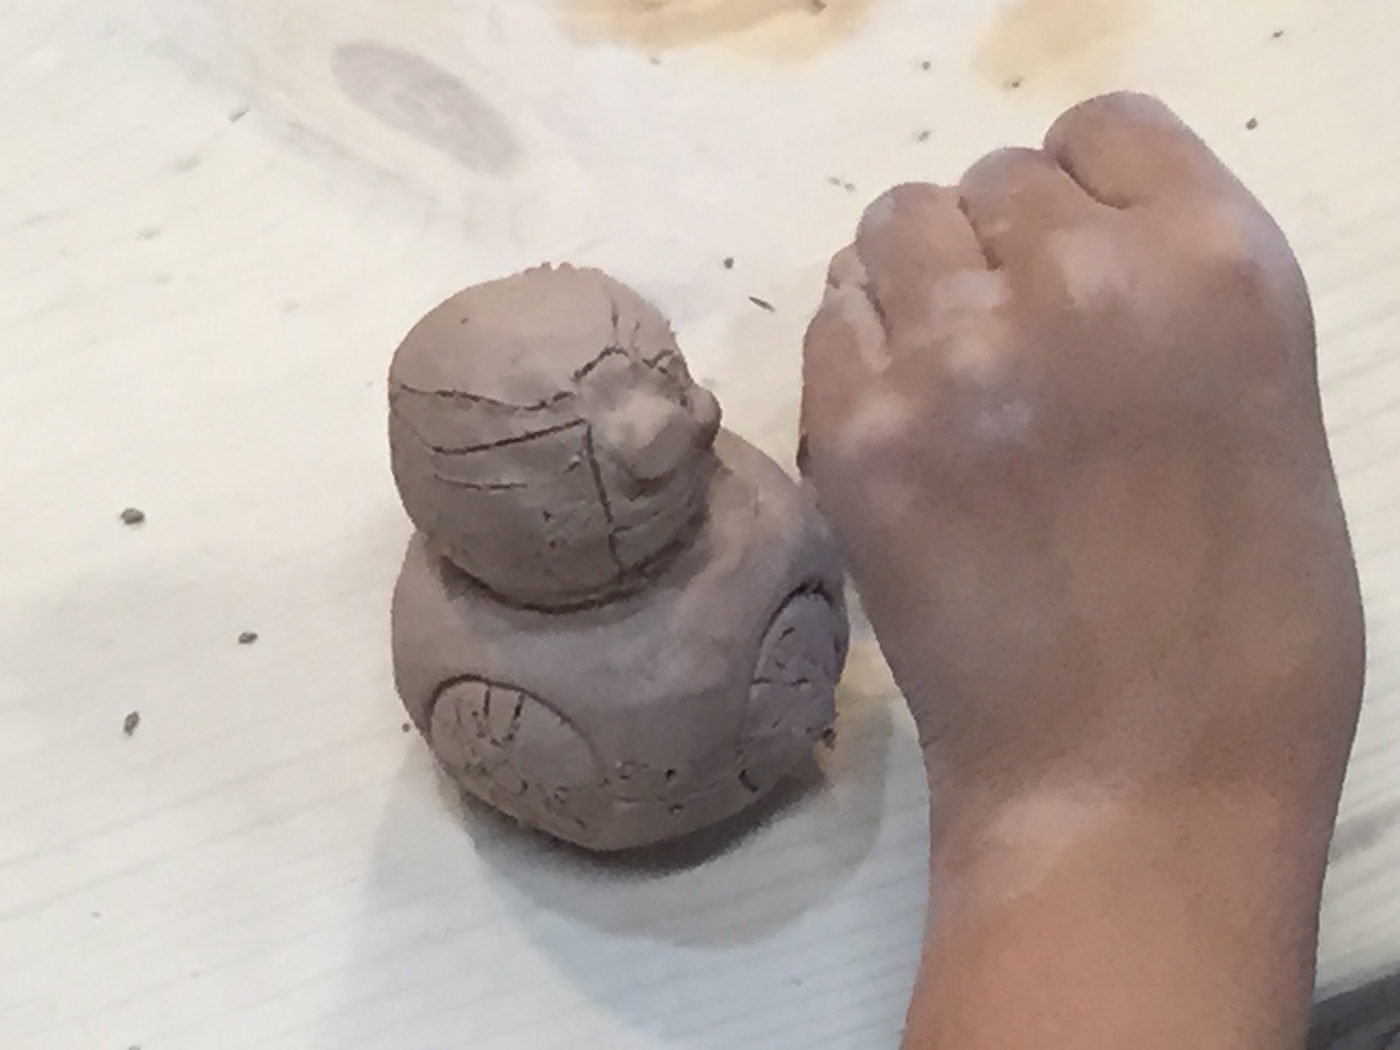
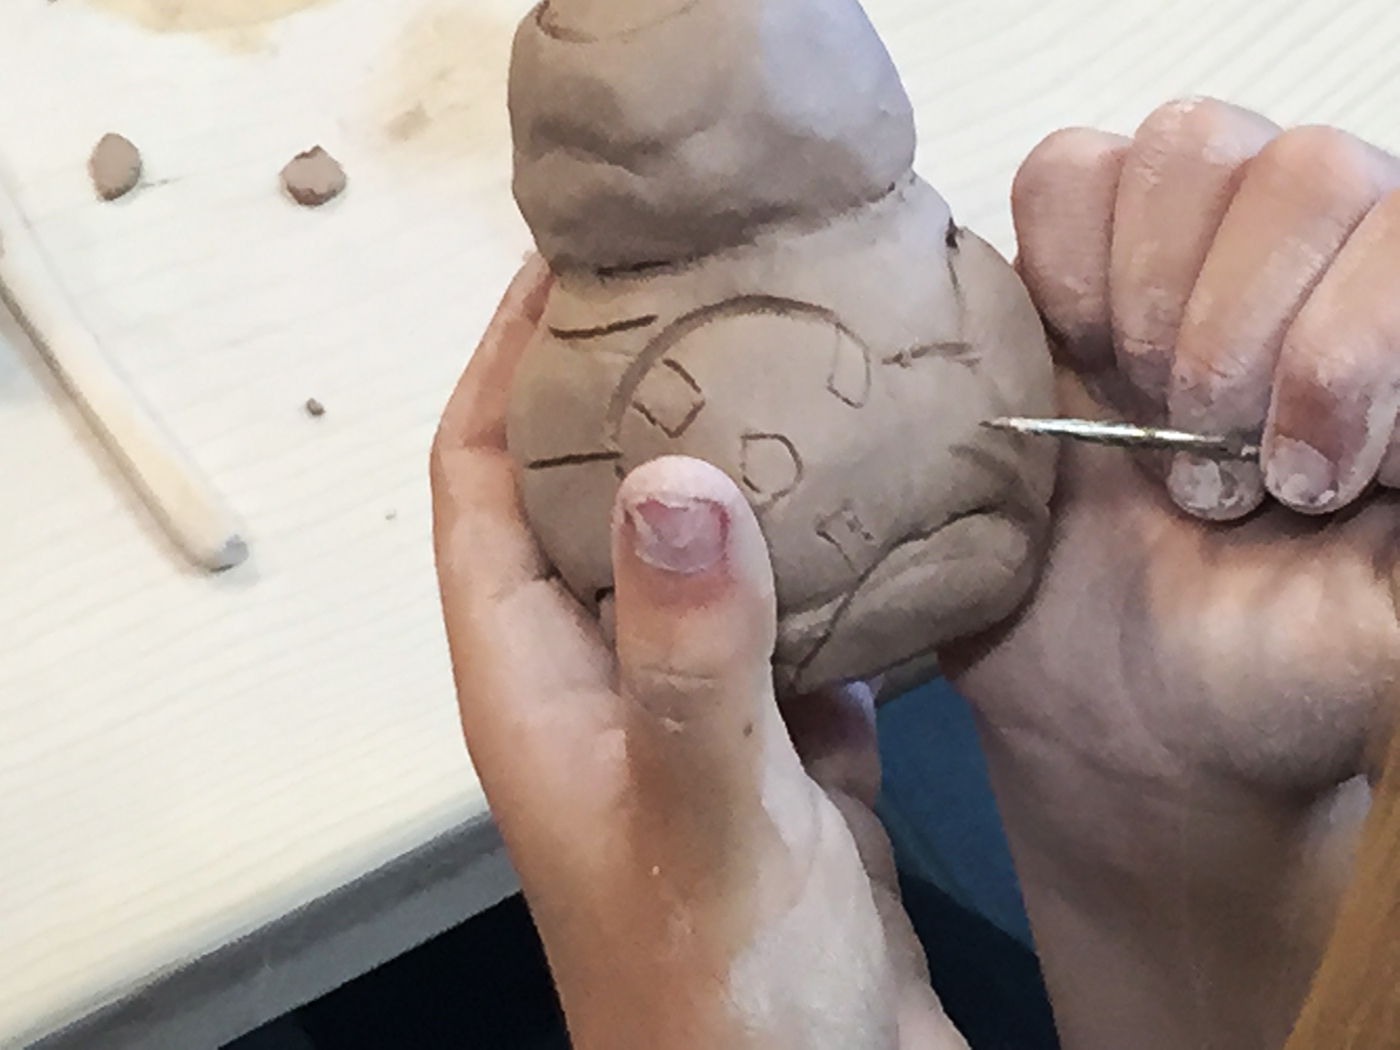
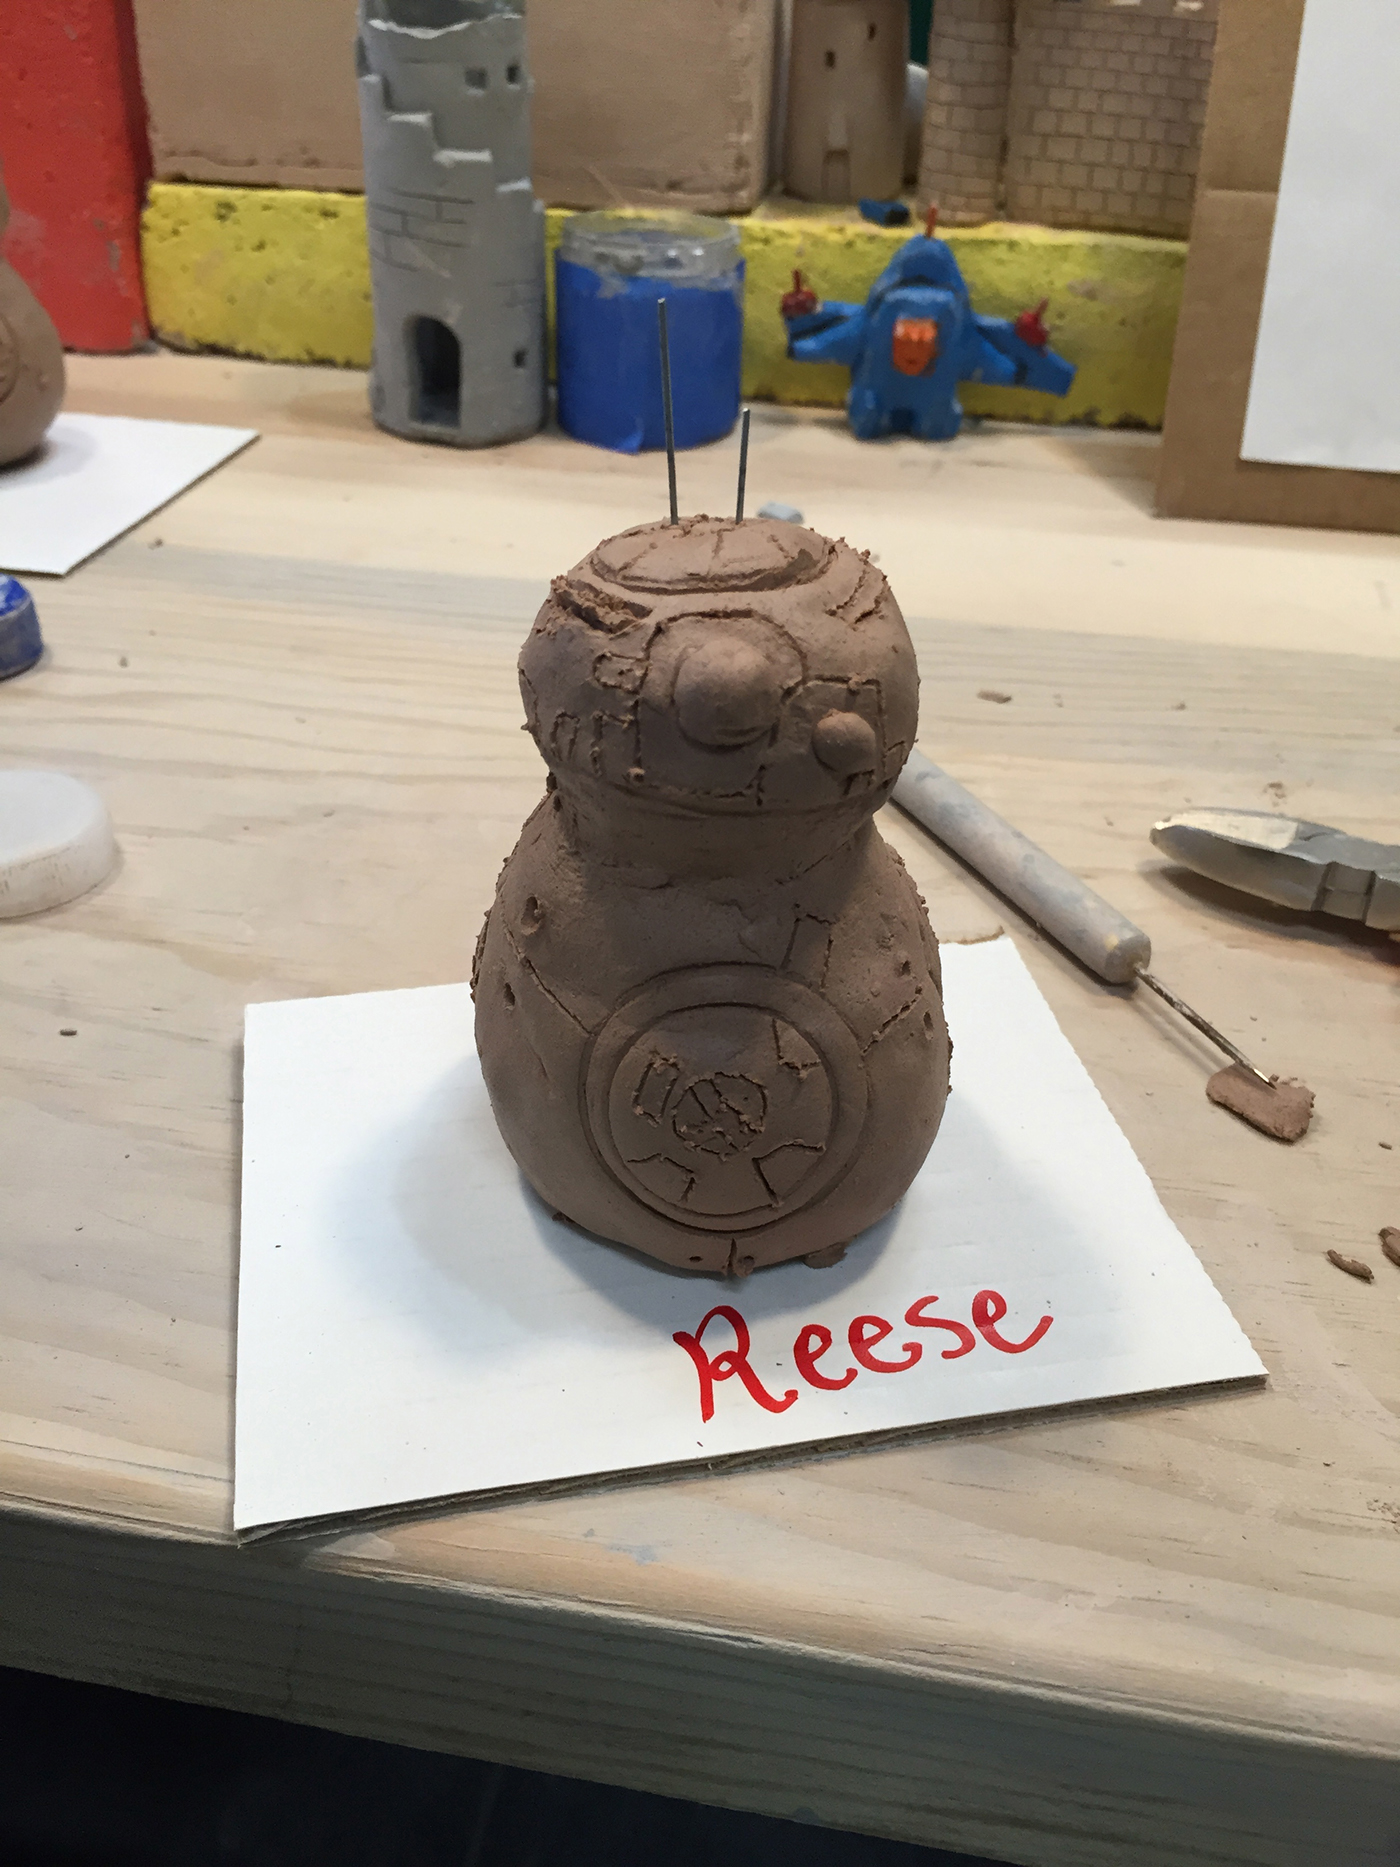
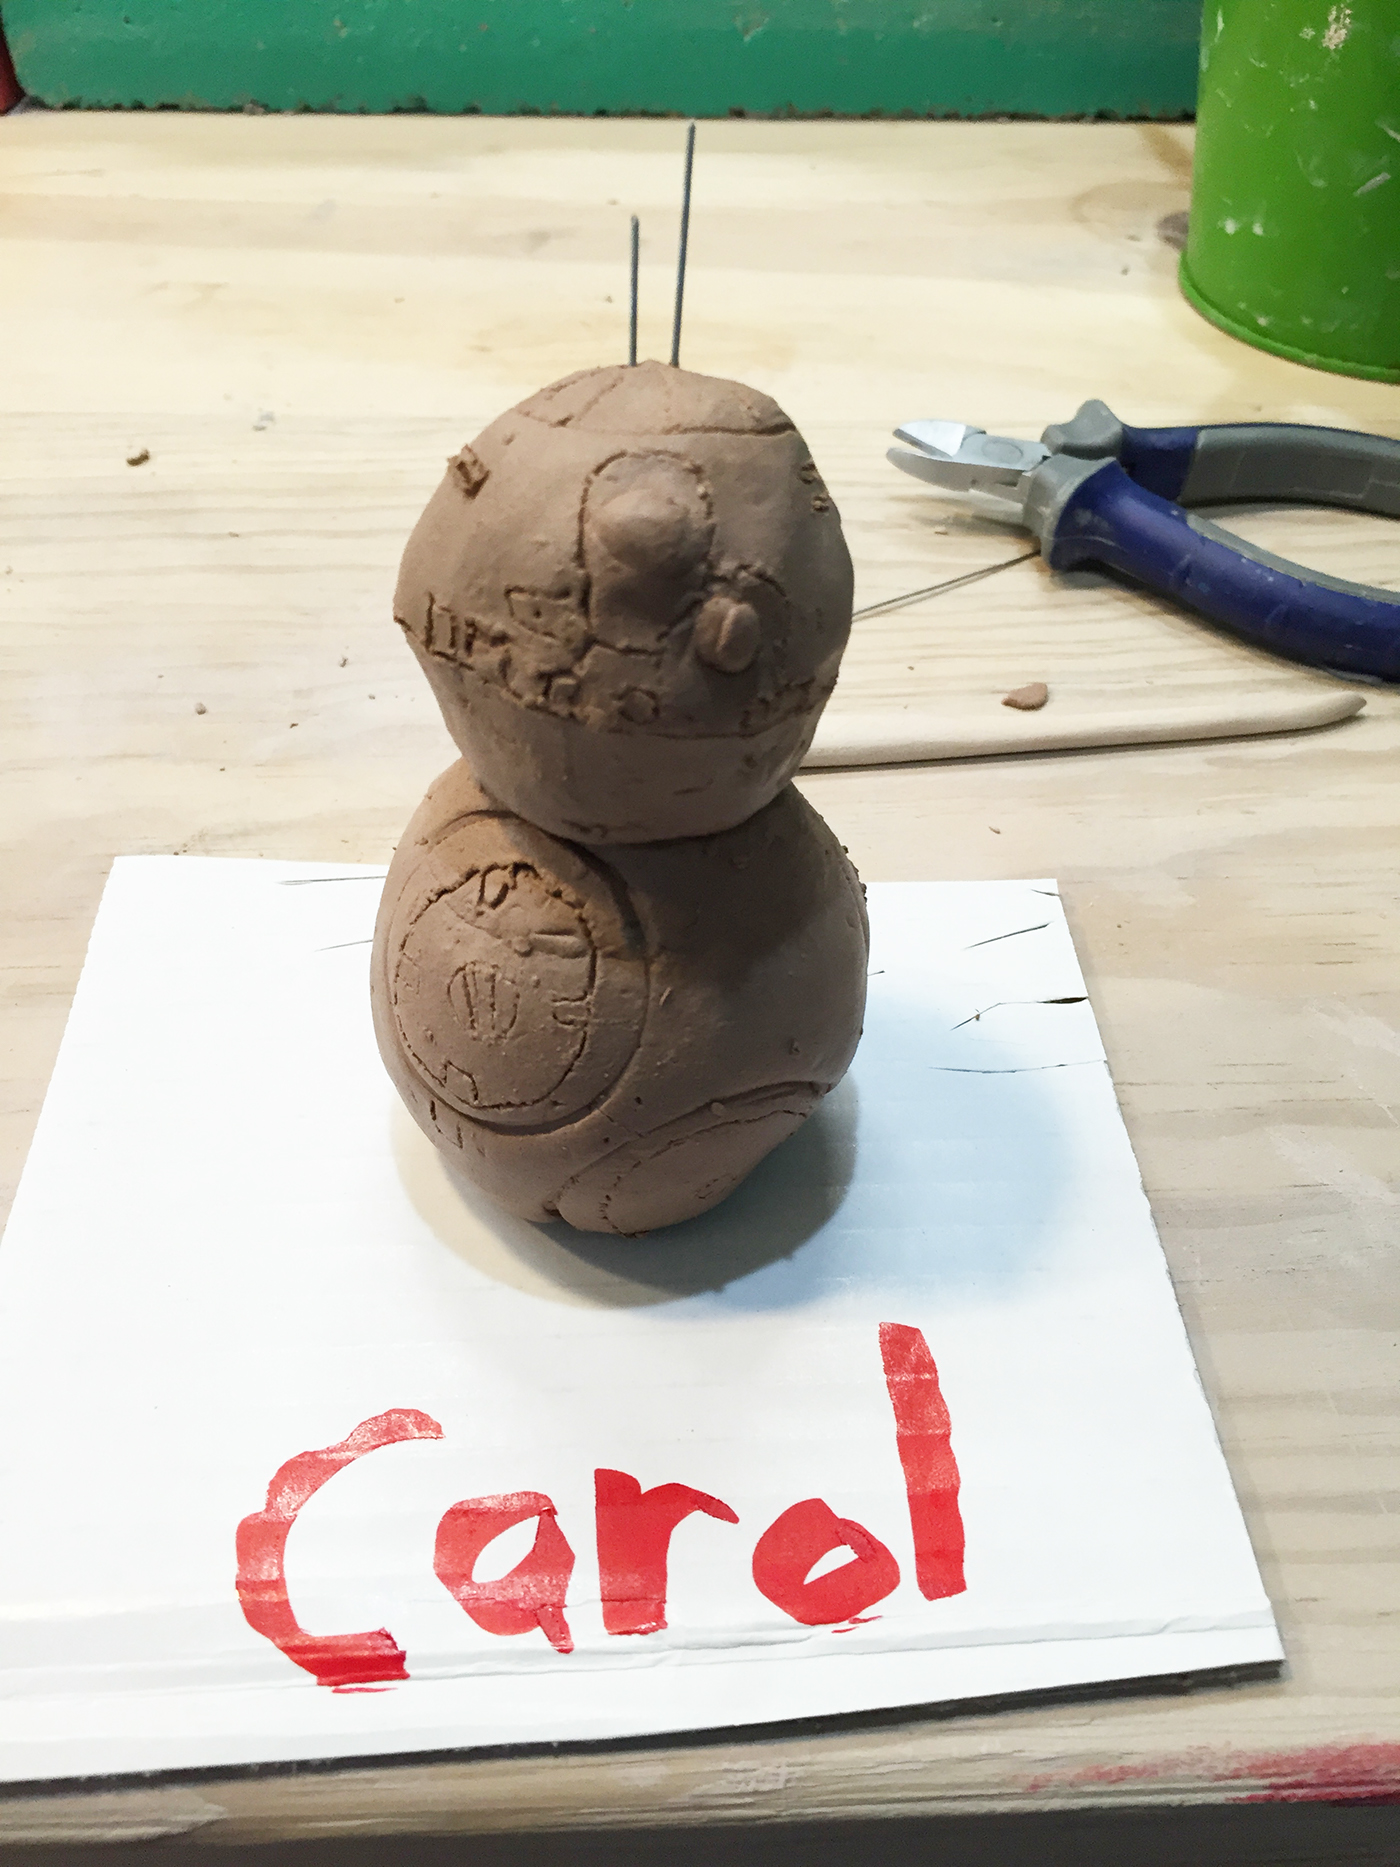
BB-8 PROJECT

Prototype Front View

Prototype Rear 3/4 View

Prototype Left 3/4 View


The BB-8 Project was developed for an hour and a half instruction for intermediate students ages 6-10. The finished work is about 2" in height and it was customized by request for a class of girl scouts. I developed this project so that it would not be too complicated to require more than the allotted time frame and yet be challenging as well as rewarding for Star Wars enthusiast!
The process consisted of the following: 1. Make a ball of aluminum paper of roughly 1 1/4" x 1 1/4". 2. Roll out a 1/3" sheath of clay and use it to cover the ball of aluminum. 3. Roll into a smooth and round ball and then gently drop it on flat table surface to create a flat surface on bottom of clay sphere. 4. Make a 1" x 1" ball of aluminum paper and then flatten to a half sphere by gently crushing ball unto flat table surface. 5. Roll out a 1/3" sheath of clay and cover half sphere of aluminum paper. 6. I provided a pencil width wooden stake with both ends sharpened and insert at the north pole of round 1 1/4" x 1 1/4" clay sphere.
7. Insert 1/2" half sphere of clay on exposes end of stake and use slip to "glue" both pieces together. 8. Using a ball point clay tool, carve out a small hole in center of half sphere. Repeat with slightly smaller hole to the bottom right of first hole. 9. Make two small balls of clay and insert into holes for camera eyes, using slip to glue to head piece. 10. Using print out of BB-8 image for reference, use a metal pointed clay tool to carve out detail for head and body decorations. (I also provided students with bottle water caps of various sizes to make perfect circles on clay surface to make detail patterns. 11. Lastly, use wire and wire cutters to cut small pieces of wire to insert on top of head to make antennas.

Student's work in progress.
Student's work in progress.
Student's work in progress.
Student's finished work.


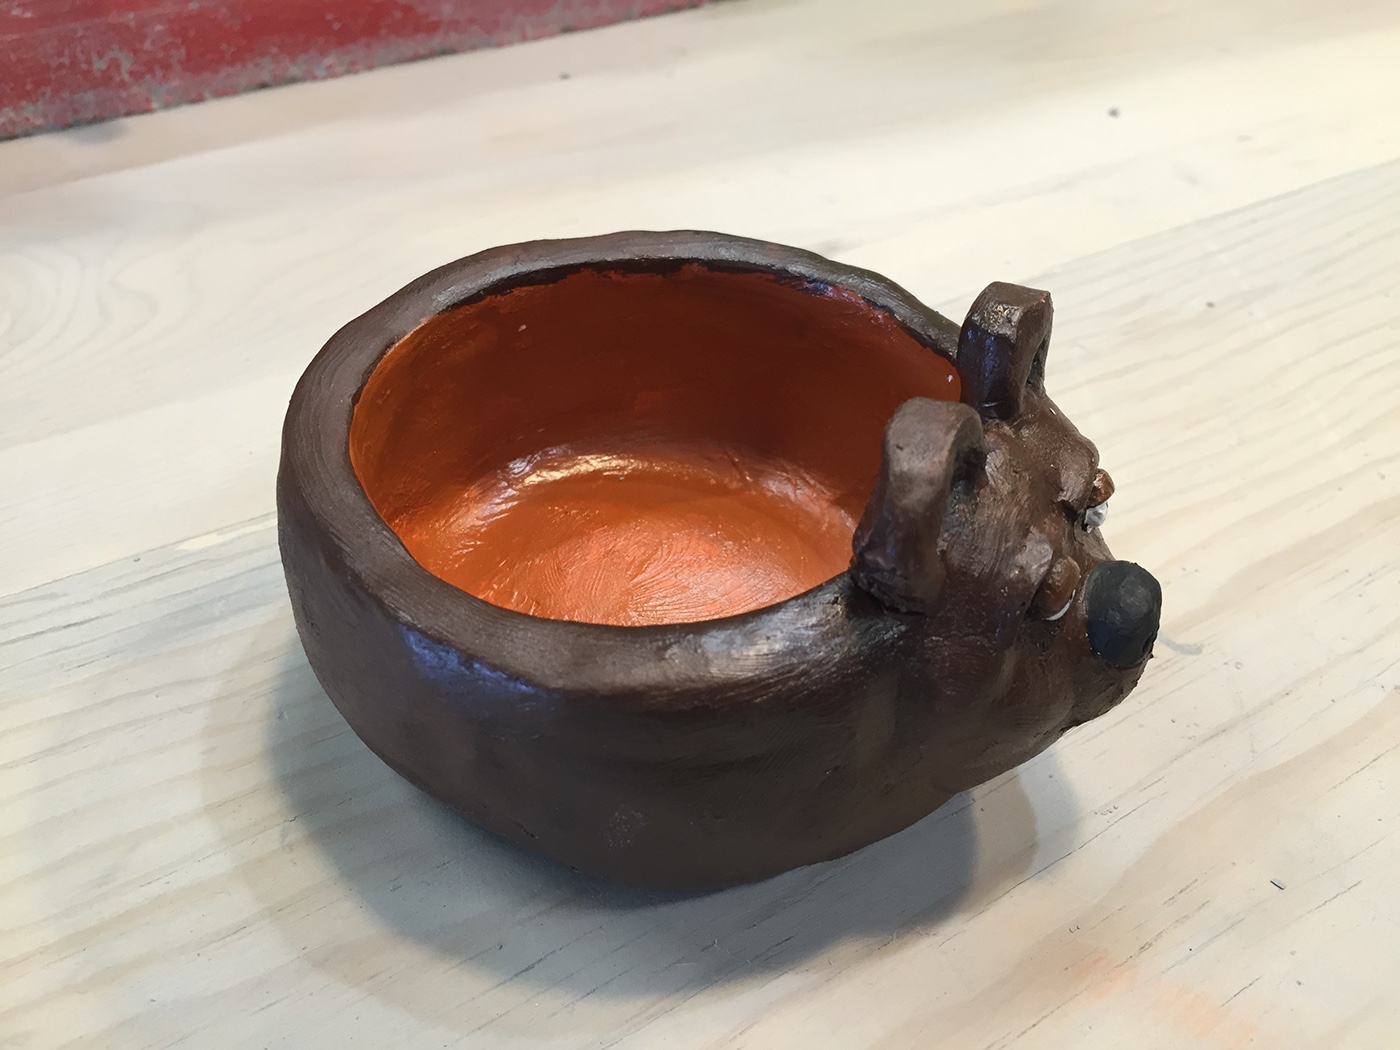
FUNCTIONAL SCULPTURES PROJECTS
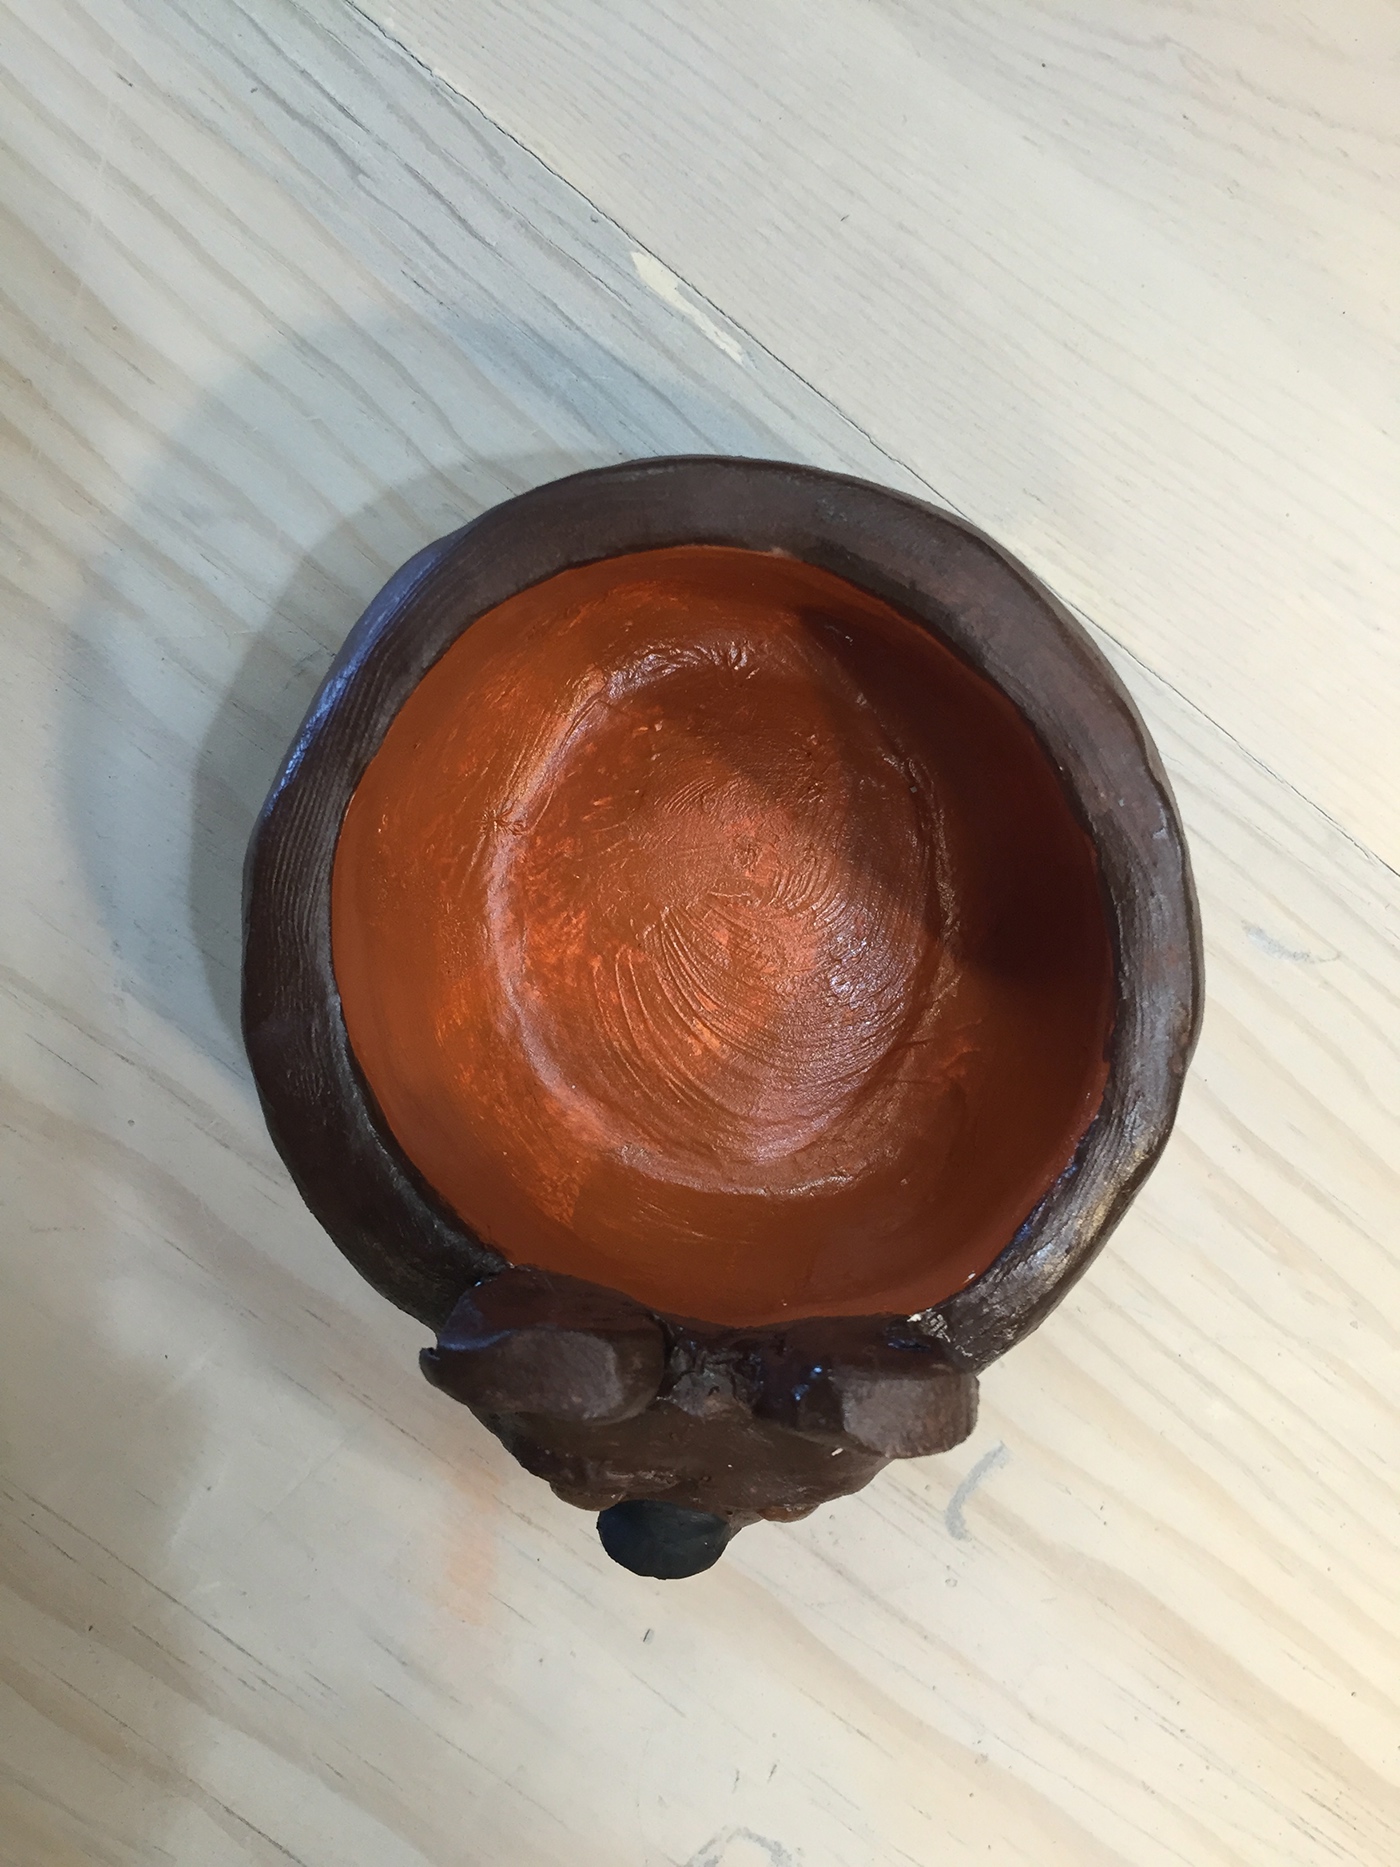
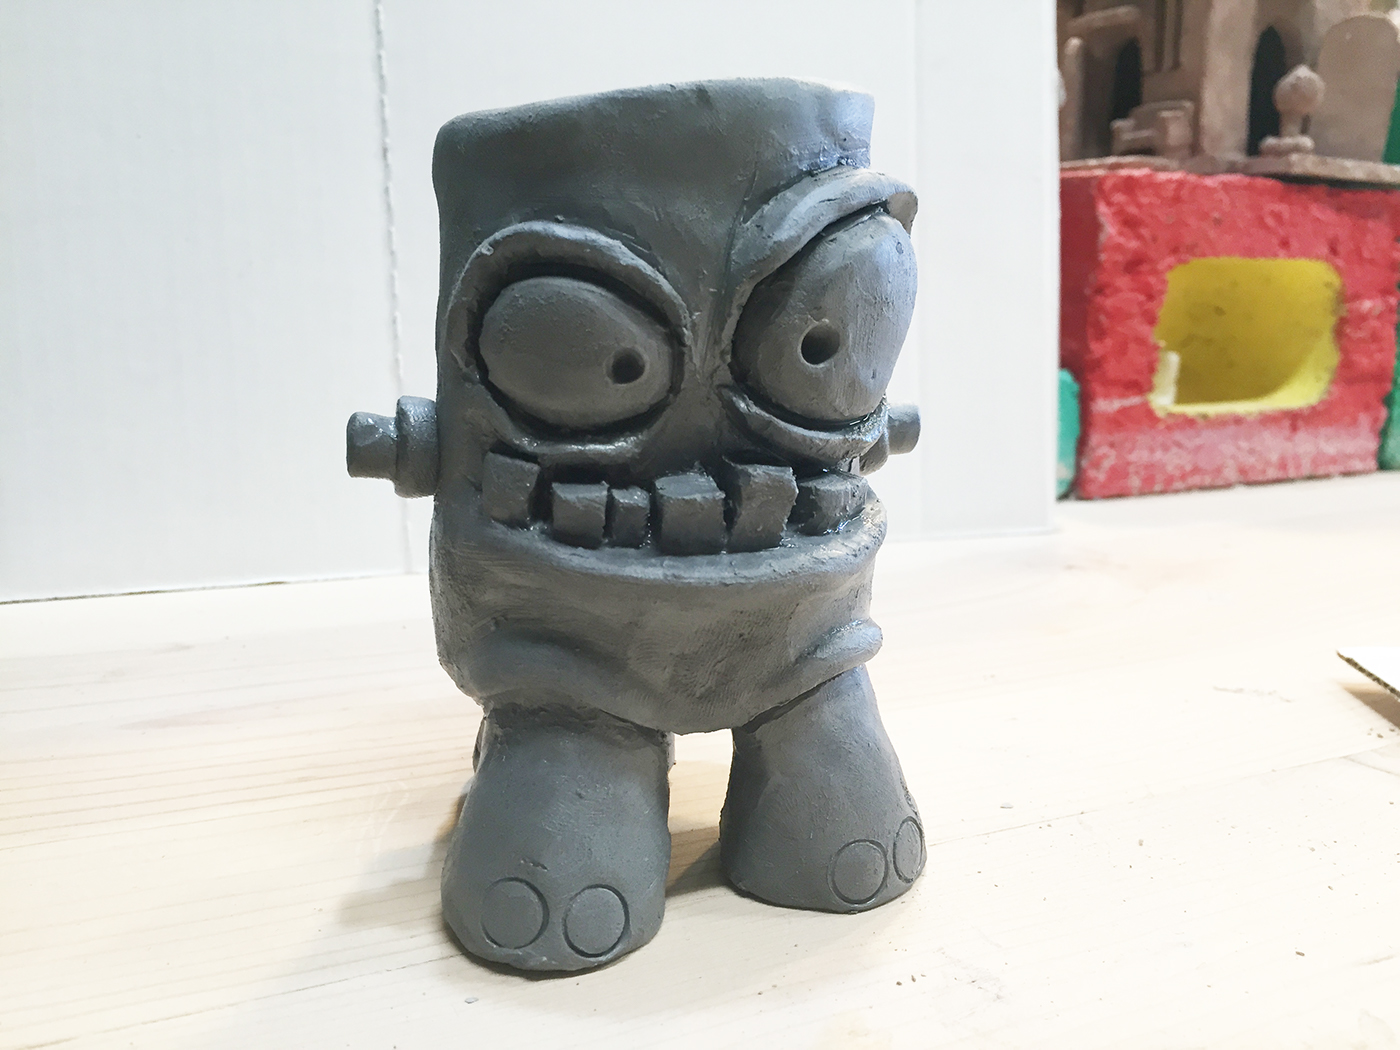
The staff came up with the idea that we should have projects that are not only decorative or artistic in nature, but also serve a practical purpose. My two contributions were the "Bear Cereal Bowl" and the "Funny Monster Toothbrush Container".


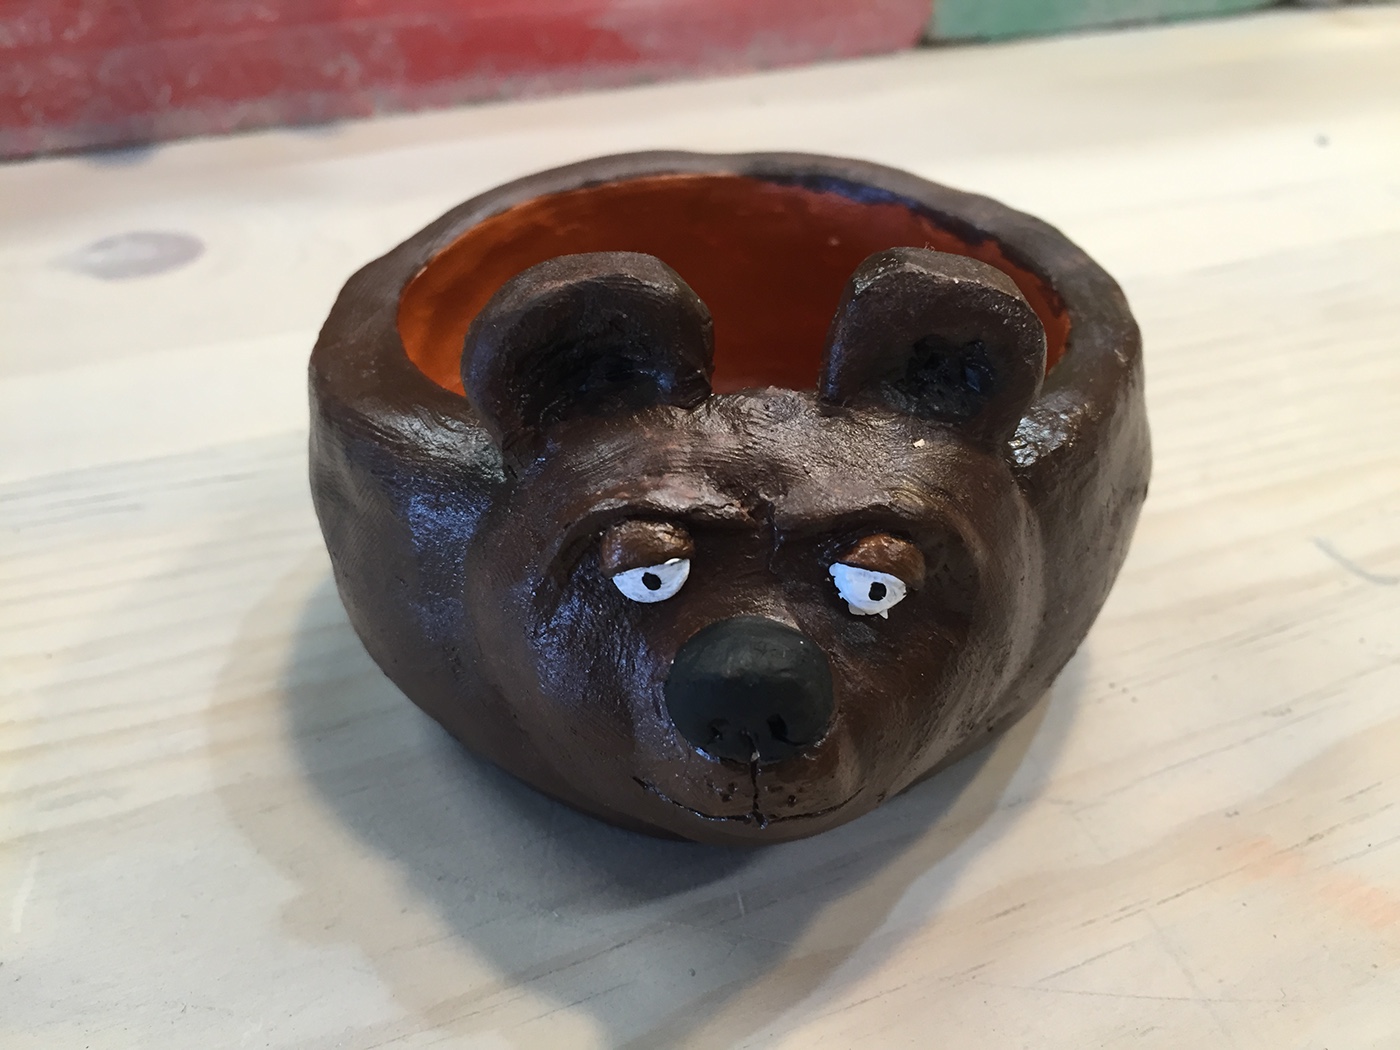

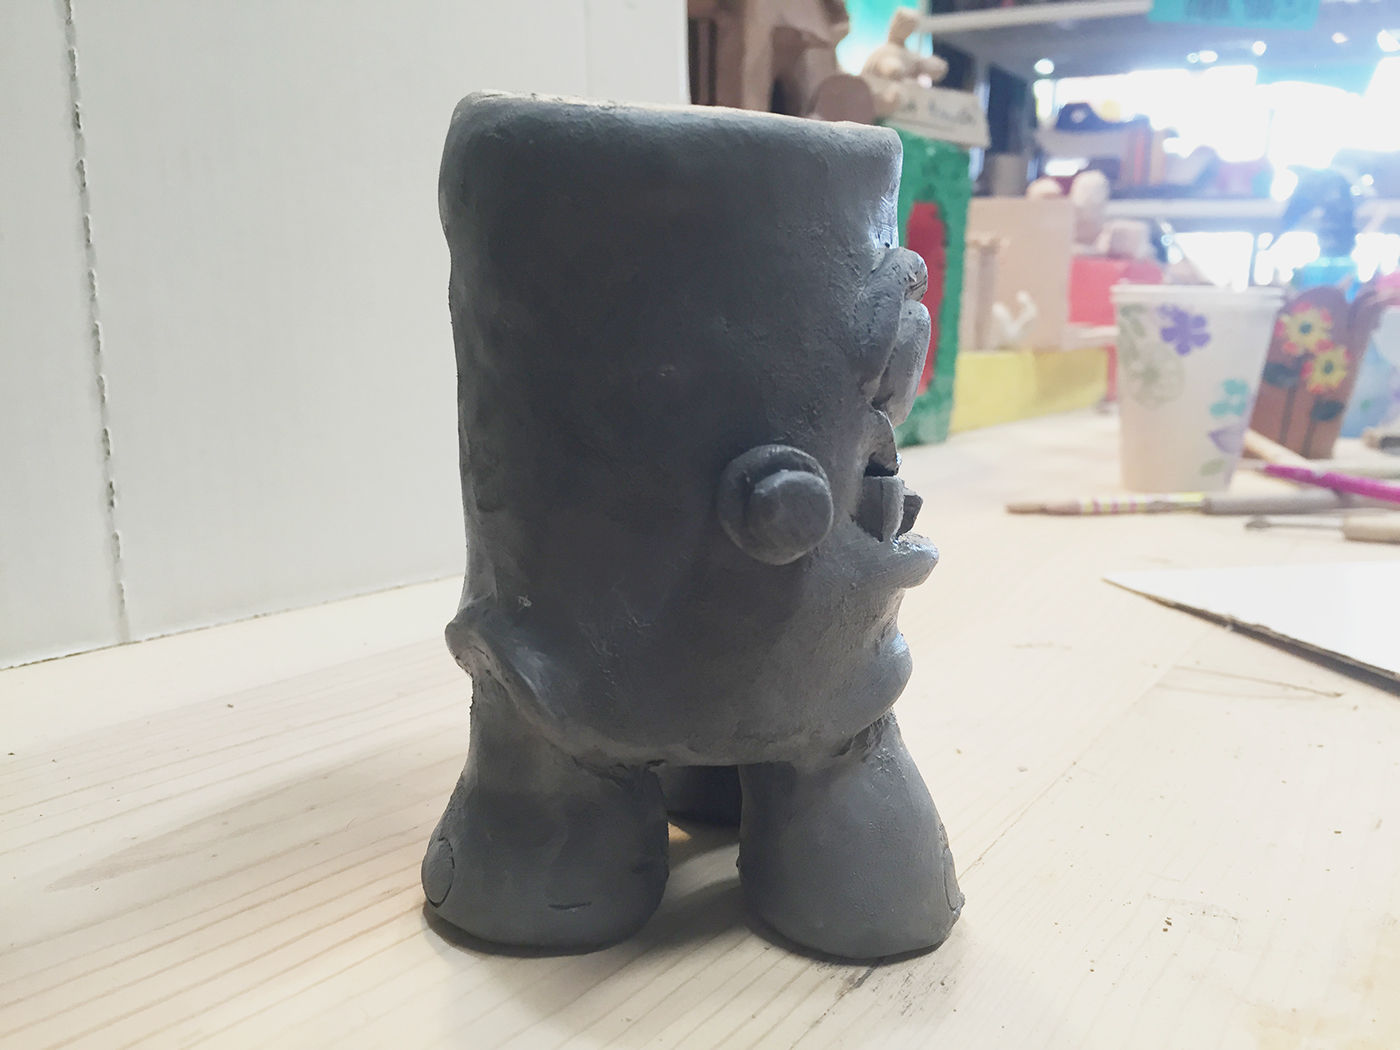
"Funny Monster Toothbrush Container"
"Funny Monster Toothbrush Container"
"Funny Monster Toothbrush Container"

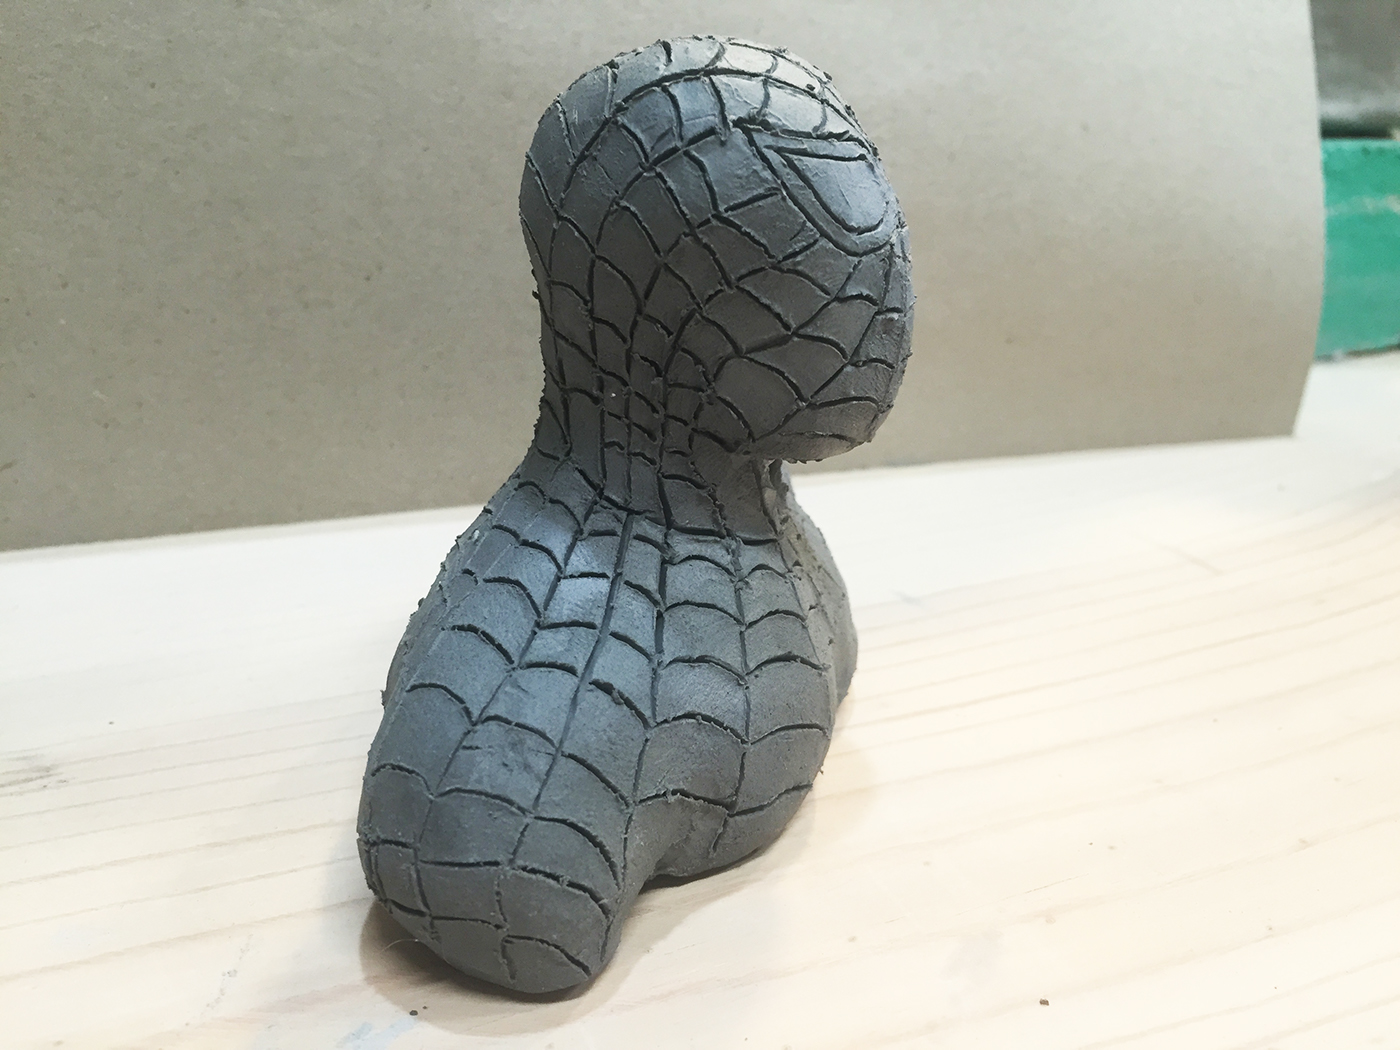
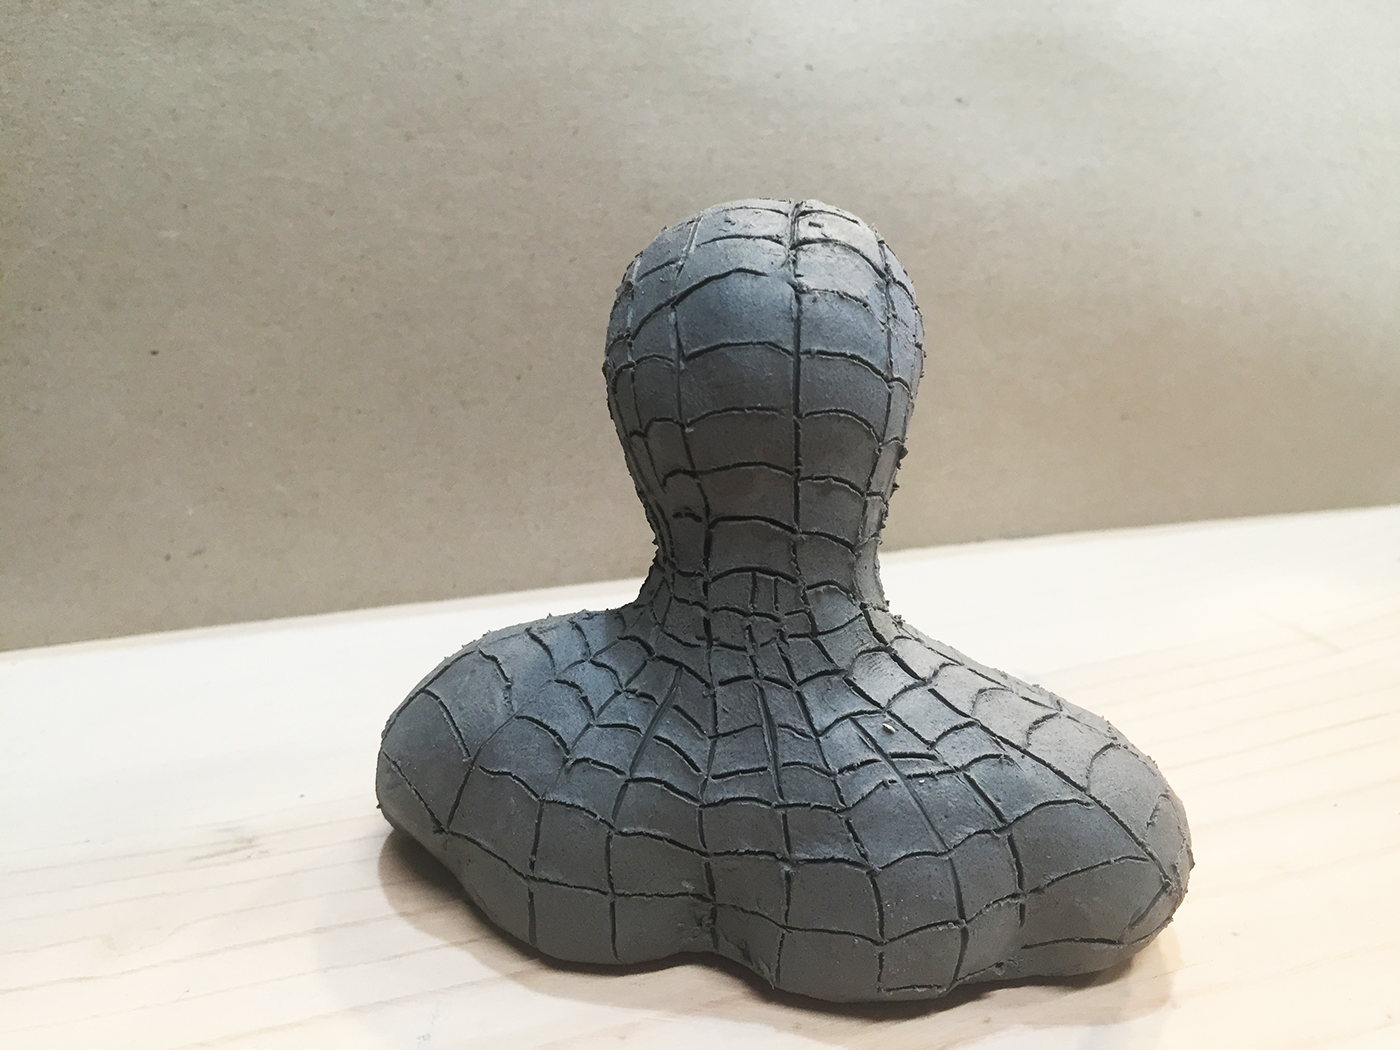
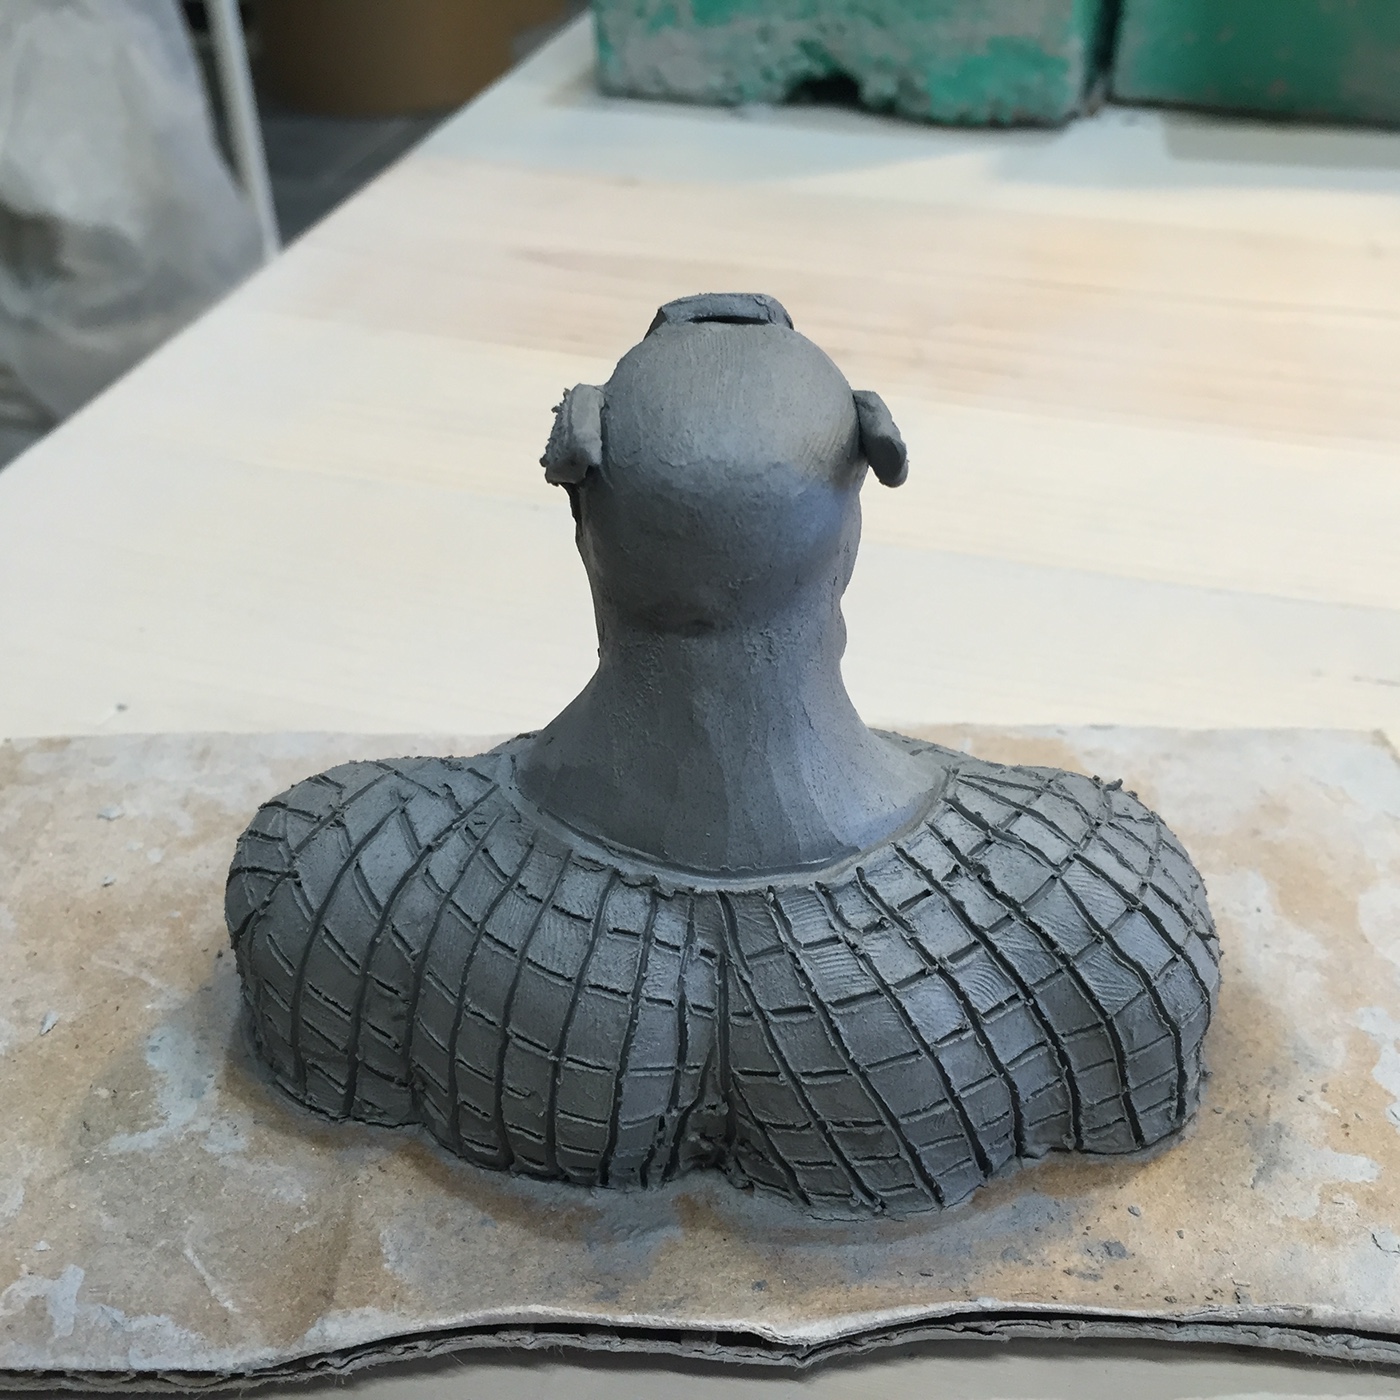
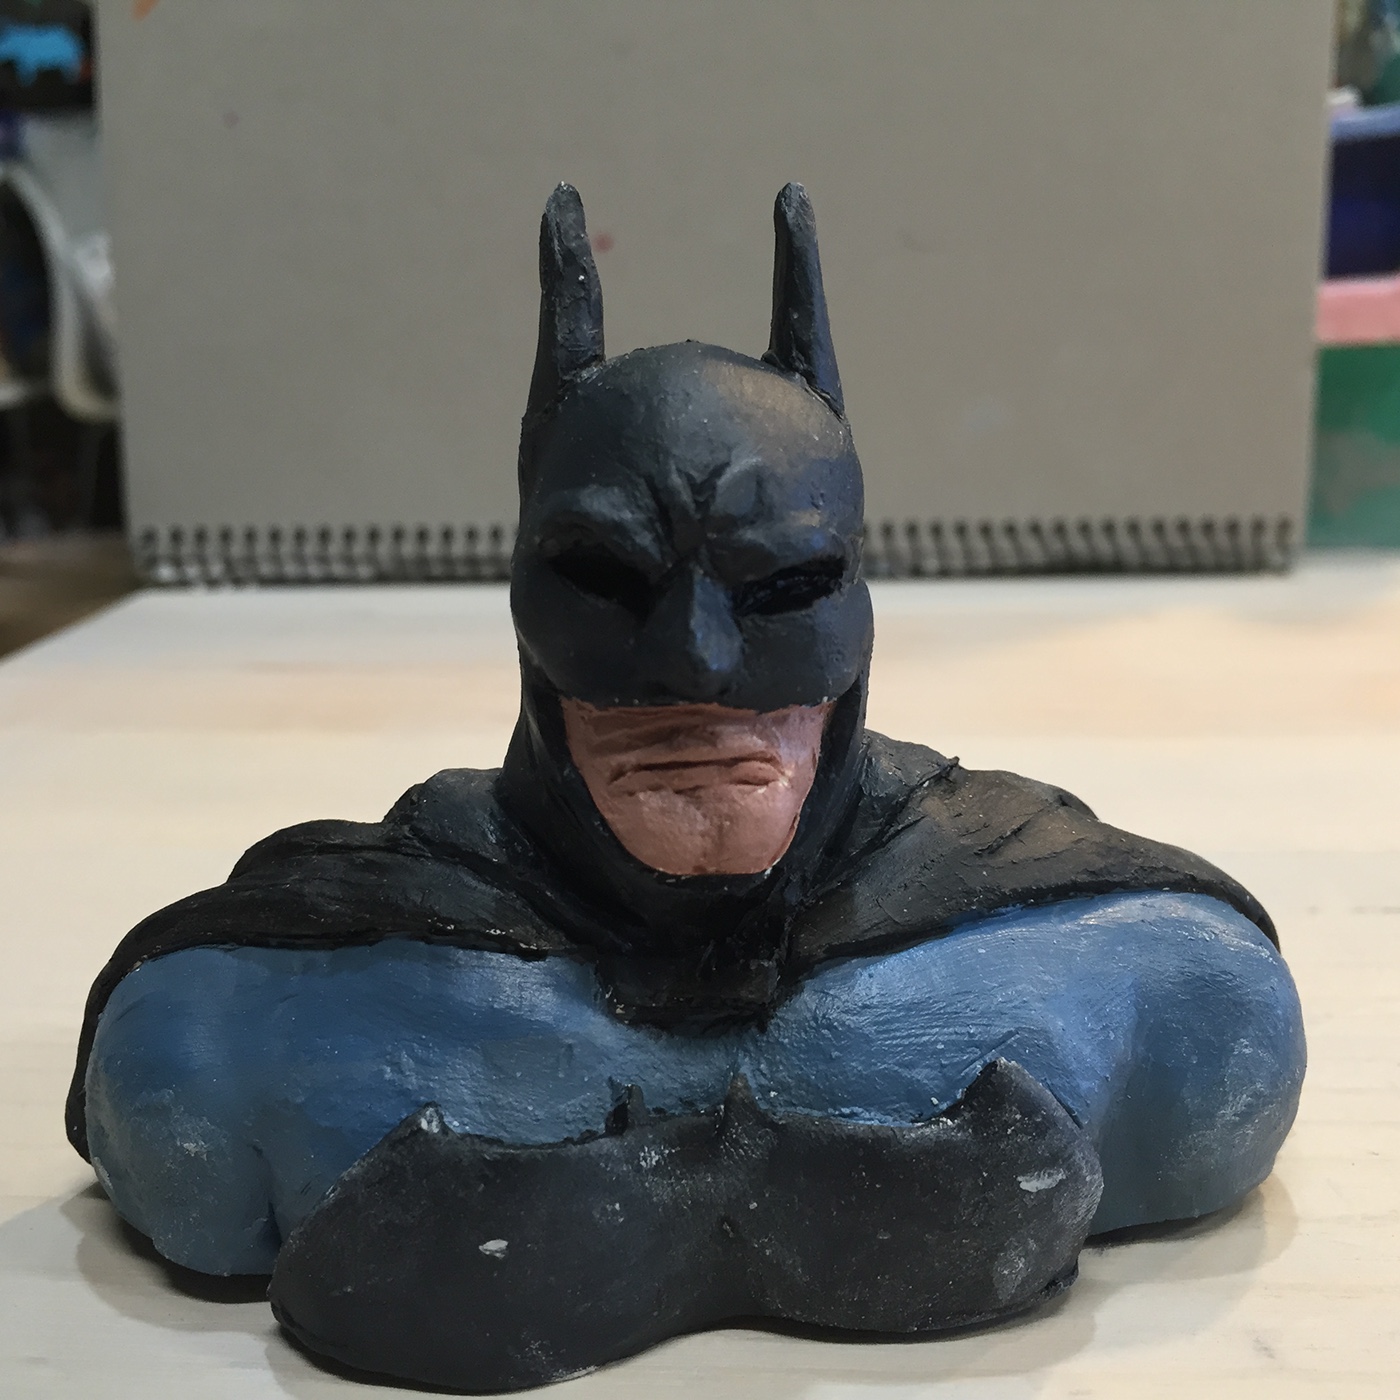
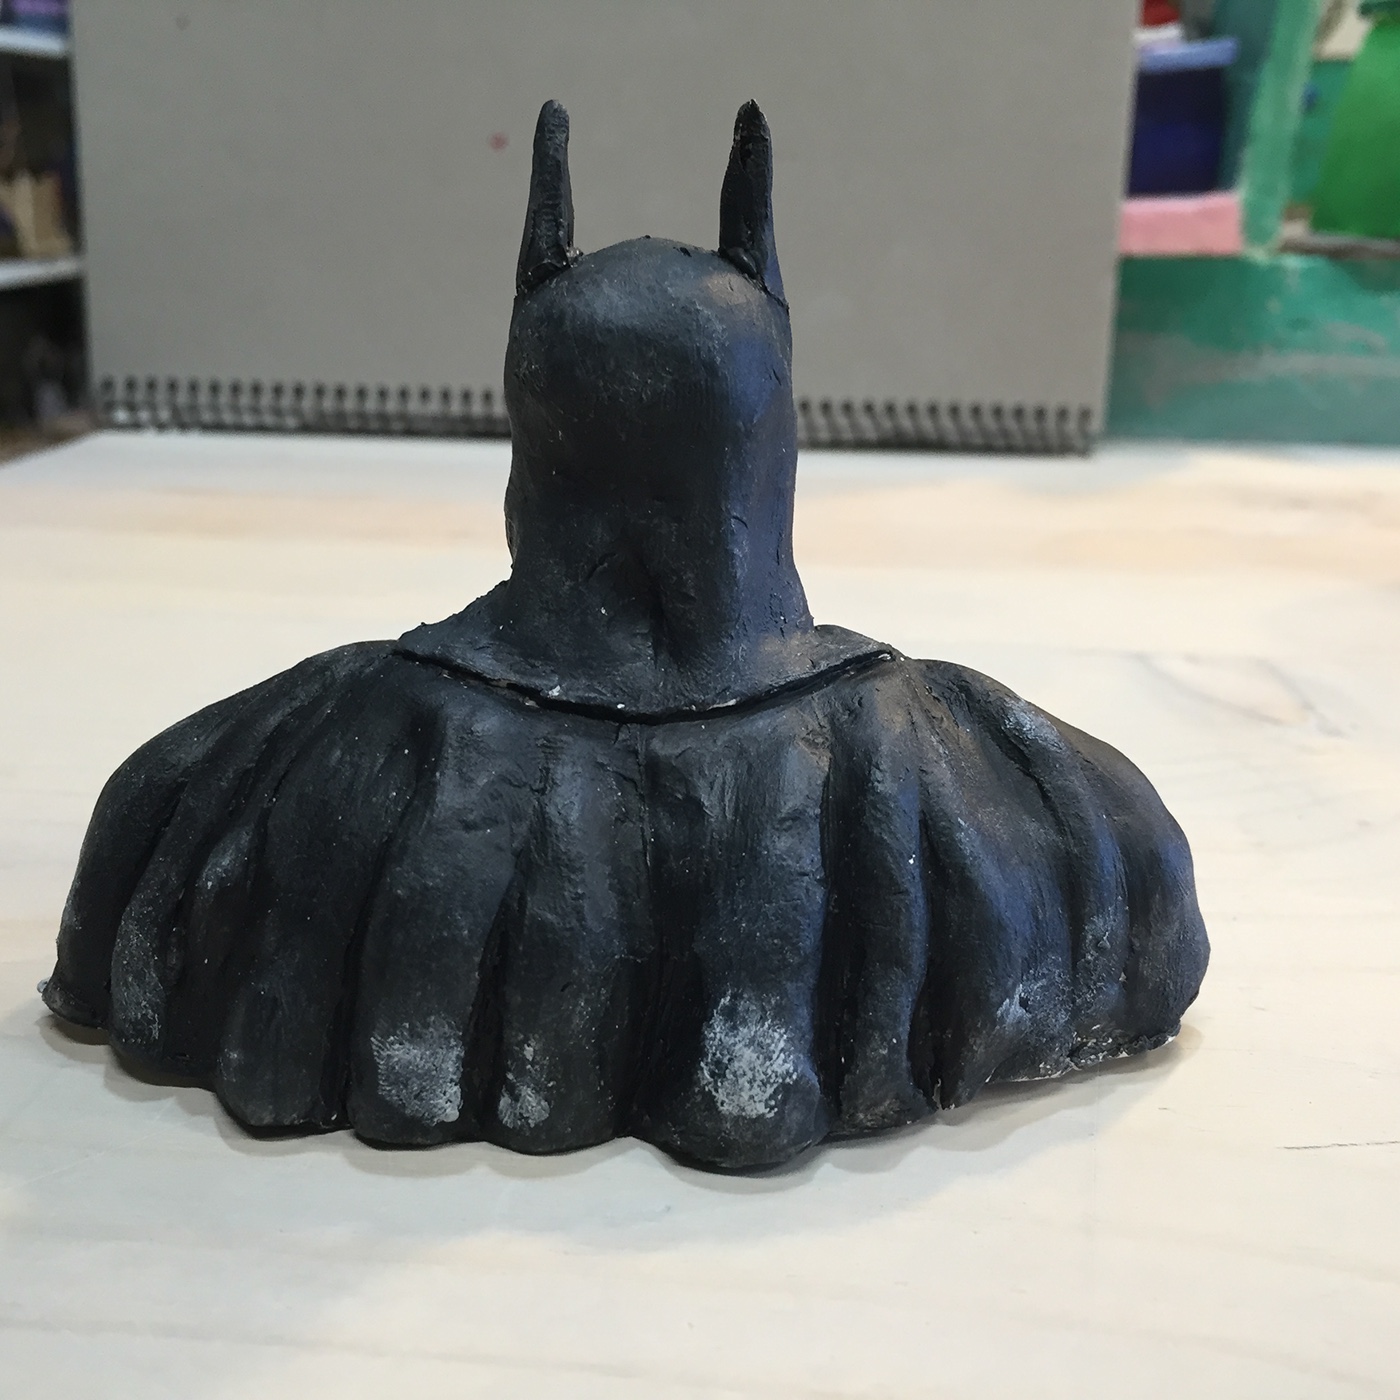
"Spiderman Bust"
This is an advanced project for students 11-15. Hand sculpted and also use of basic wrake. Detail done with pointed clay tool.


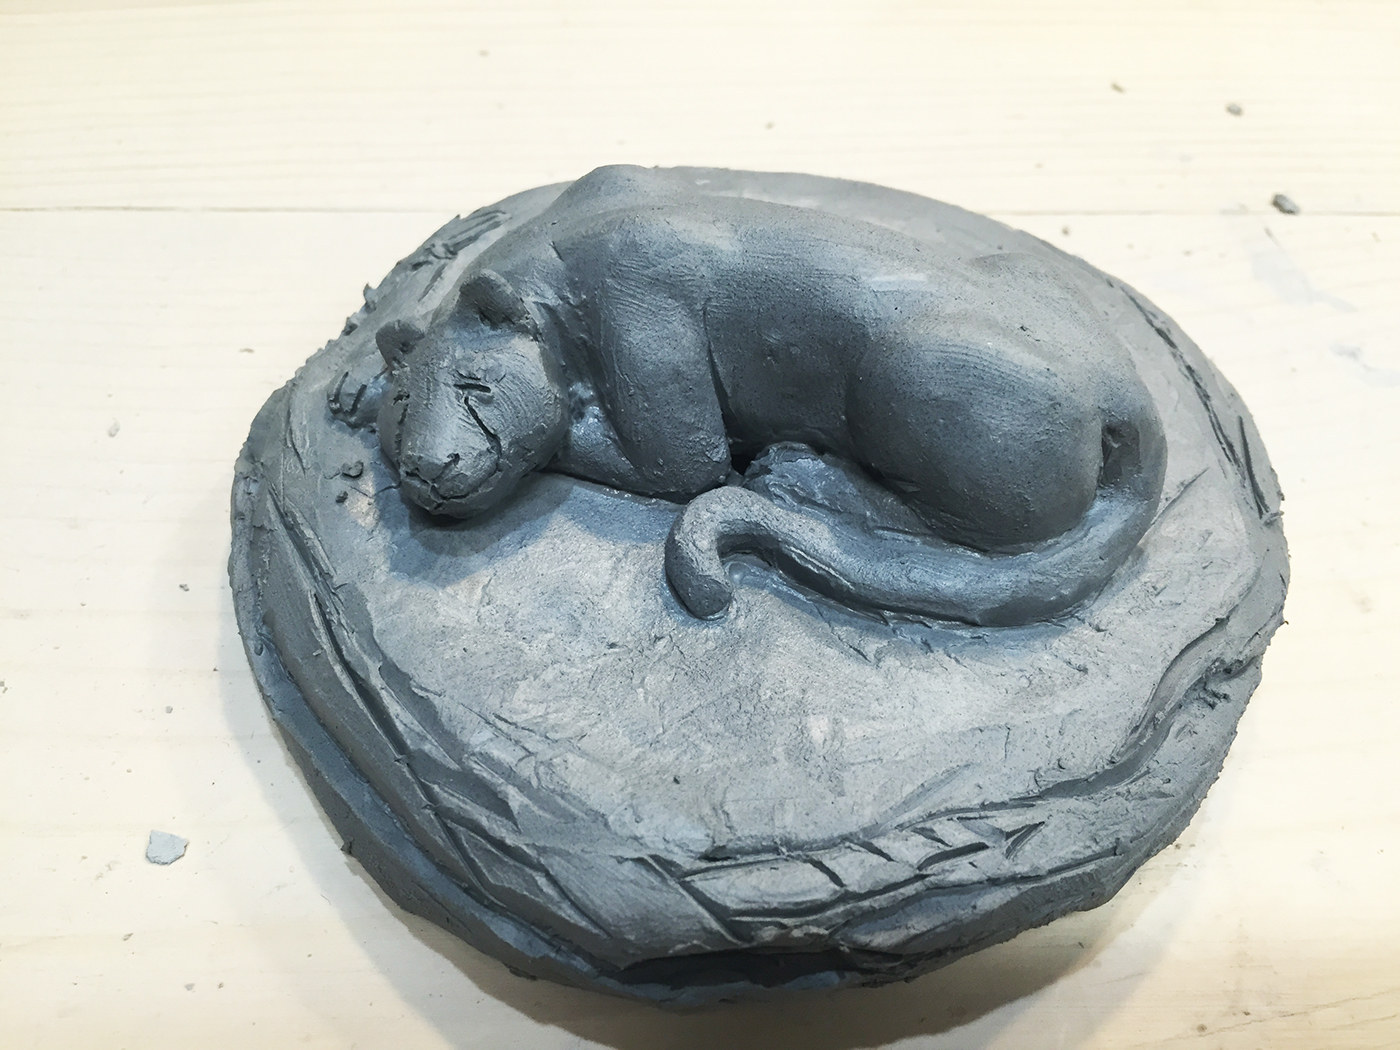
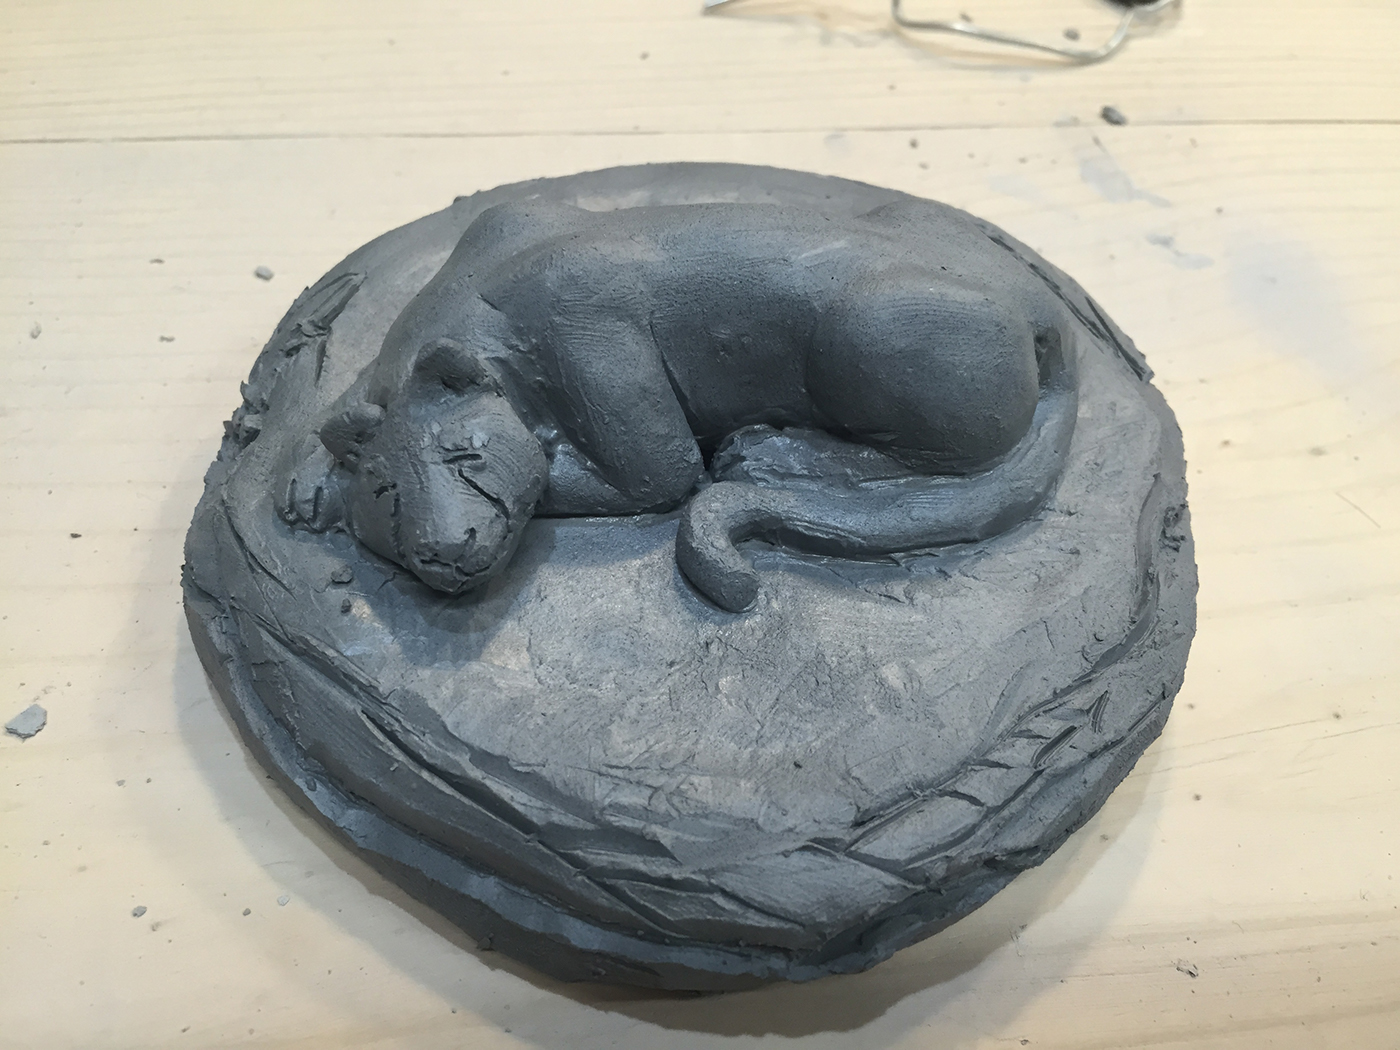
"Cheetah At Rest"
This was a custom sculpture that I made as a guide to immitate by a student who had to make a presentation for a school project. I started it piece by piece as the student followed along and I assisted when there was technical complications. Unfortunately I did not have my camera with me when the student finished her project! She did a very fine job!


"GARFIELD"
Intermediate to advanced project for children 7-15. This sculpture requires basic knowlegde of cat anatomy, although it is a styleized version of a real cat, it nevertheless requires the right proportions and detail not very esy for young kids or kids with little sculpting experience. The body is shaped from a basic ball but the limbs are carved out with clay tools. The tail is shaped with a wire sub-structure.


Corgy Project
One of my students came to me with a request to help her sculpt two pieces for her show and tell project for school. She brought with her two pictures of her corgy. One of them was a funny gag that she thought up. It is the one with the dog's face with a piece of white bread that she placed around his head and photographed it. She wanted to help me sculpt it so that she could follow along and sculpt alon with me. The second was also a picture of the same corgy but in a normal pose but she liked it because of the funny face the dog made when the photo was taken.


"WILD BOAR"
This project is for students 13-15


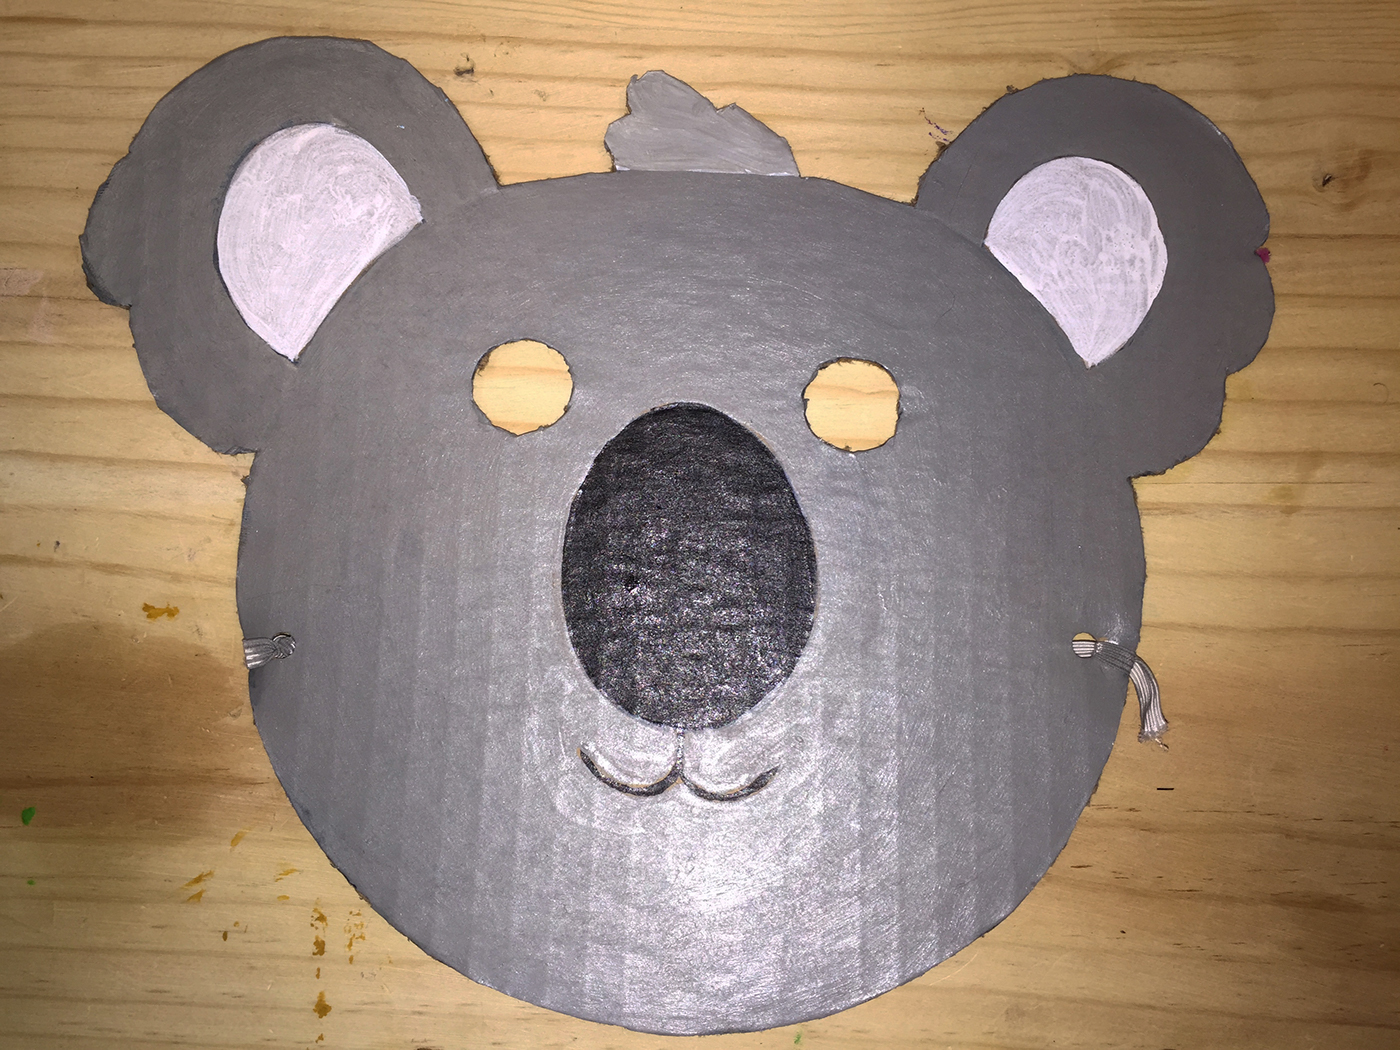
CARDBOARD MASKS PROJECT
I developed this project to serve a couple of functions. First it is a drawing project for students ranging from ages 6-10.
The Student picks an animal and either together with the teacher or on their own (based on drawing ability and experience)and they draw the face of the animal on a piece of cardboard. Then the student cuts out the silhouette with scissors and if they are old enough, they cut out the eyes with an exacto knife under instructor supervision. Then they take the mask to the painting station and paint their mask. For younger students, I use the masks below to create a stencil and the younger students use a thinner piece of cardboard to trace and then cut out the mask. Then they paint their masks. The final step is to punch two holes
at either end of the mask and tie an elastic band.


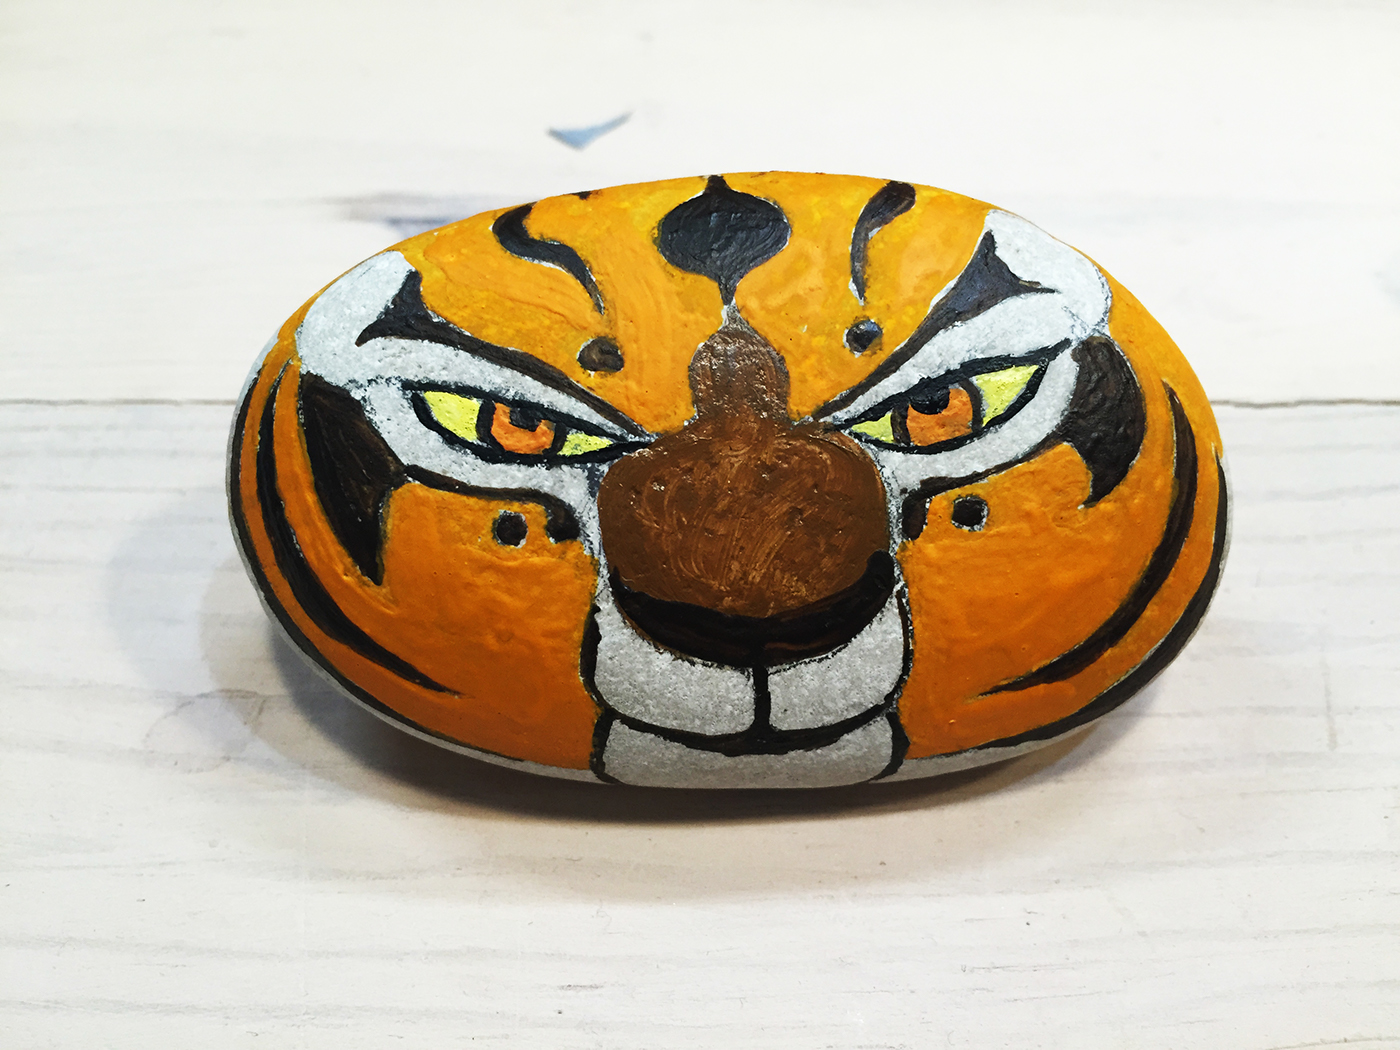
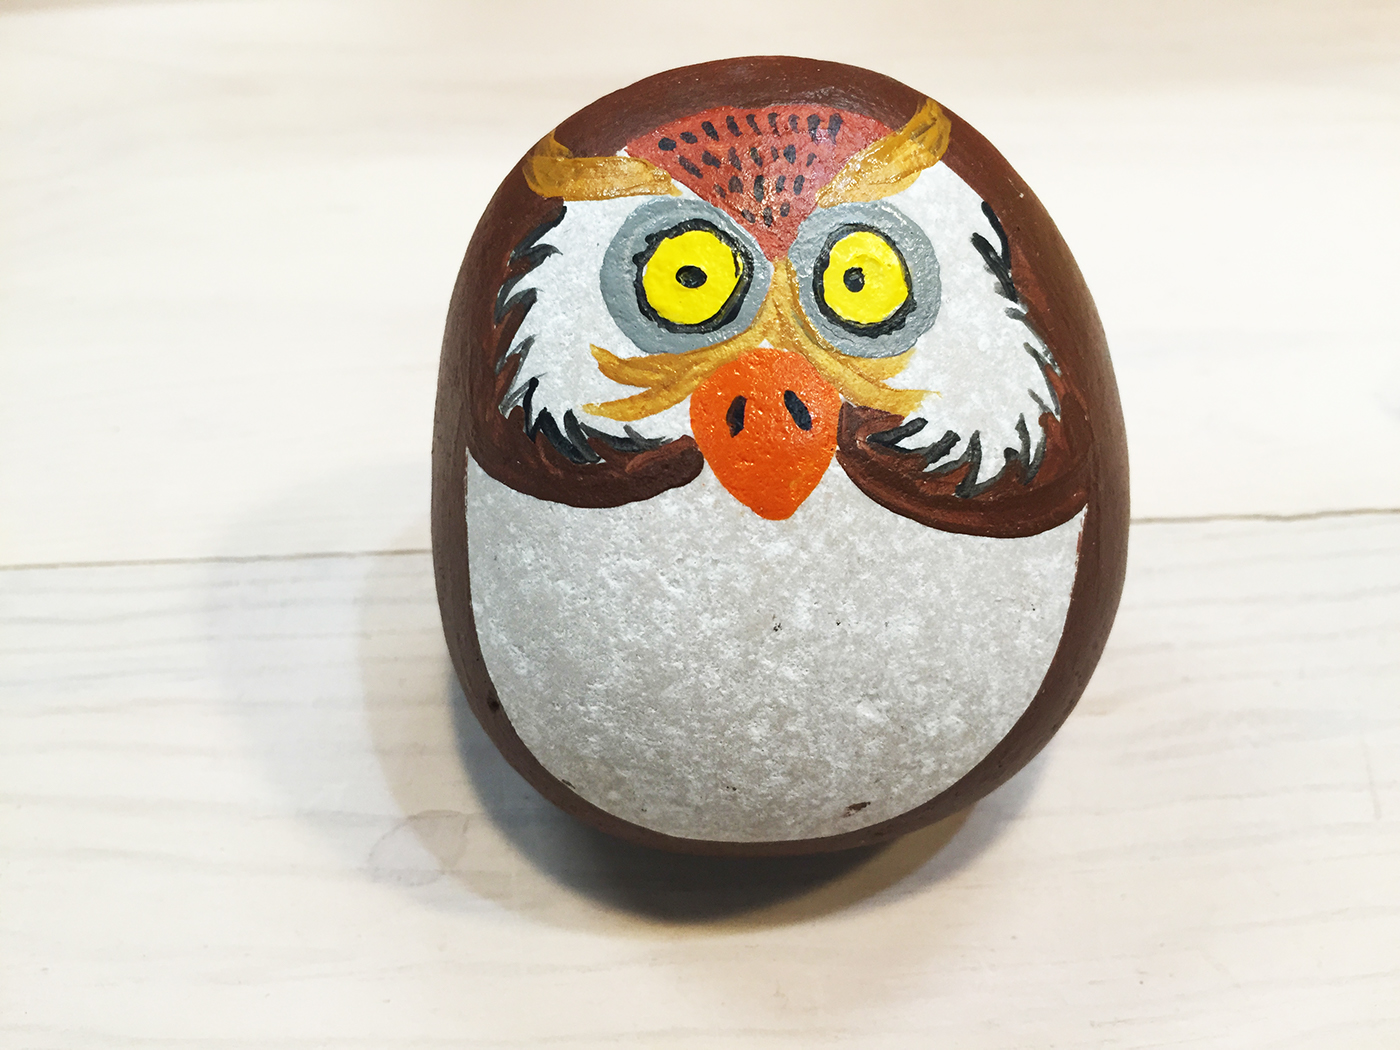
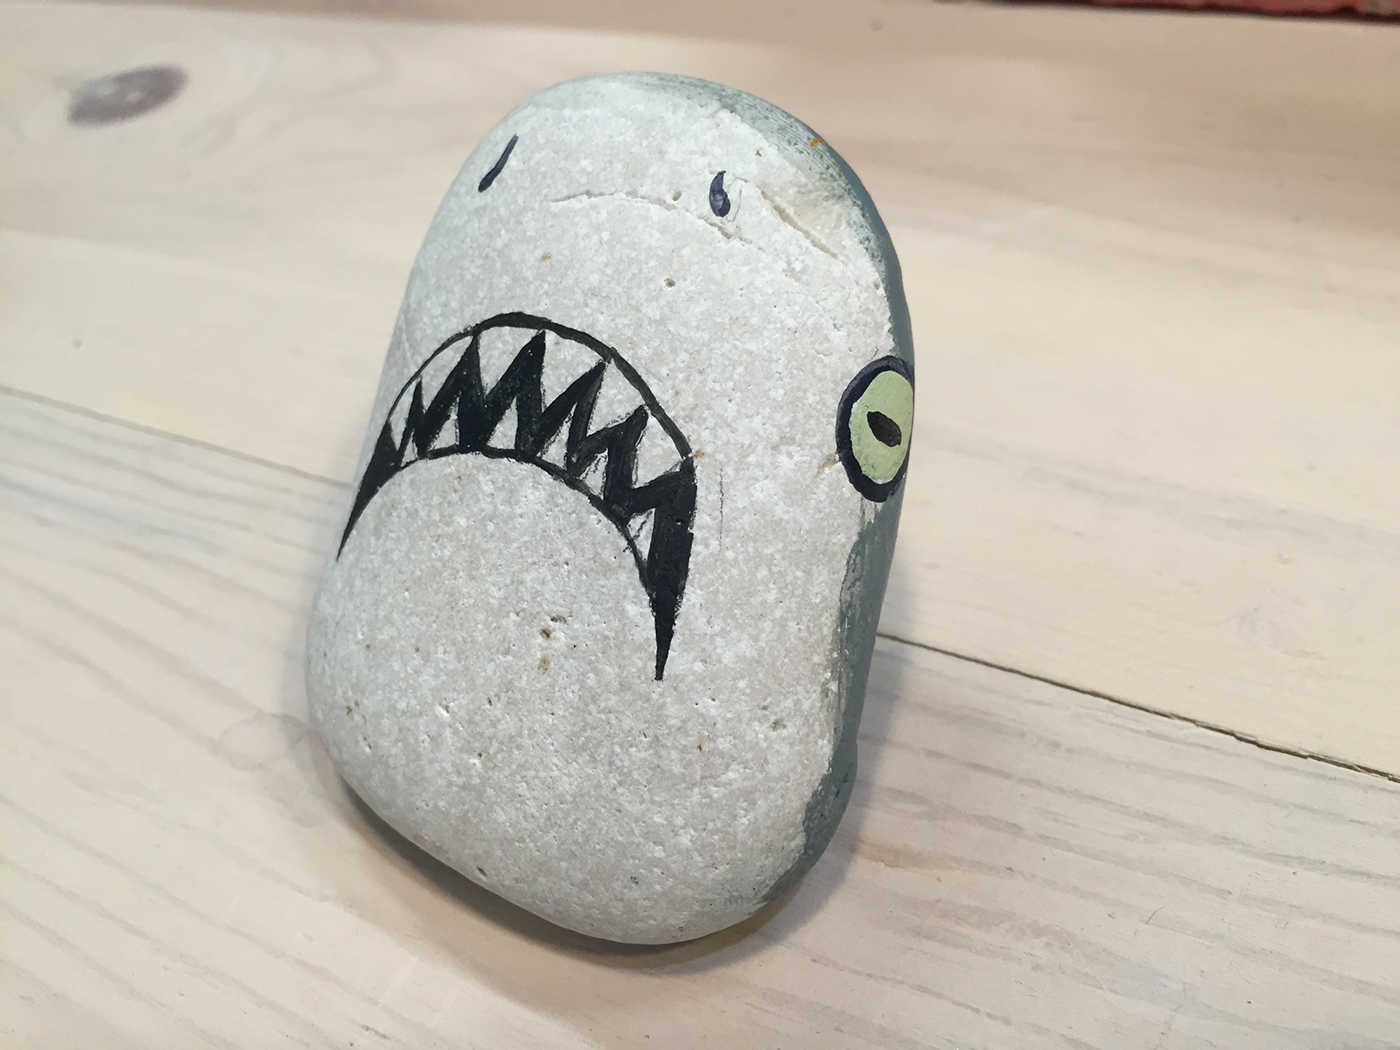
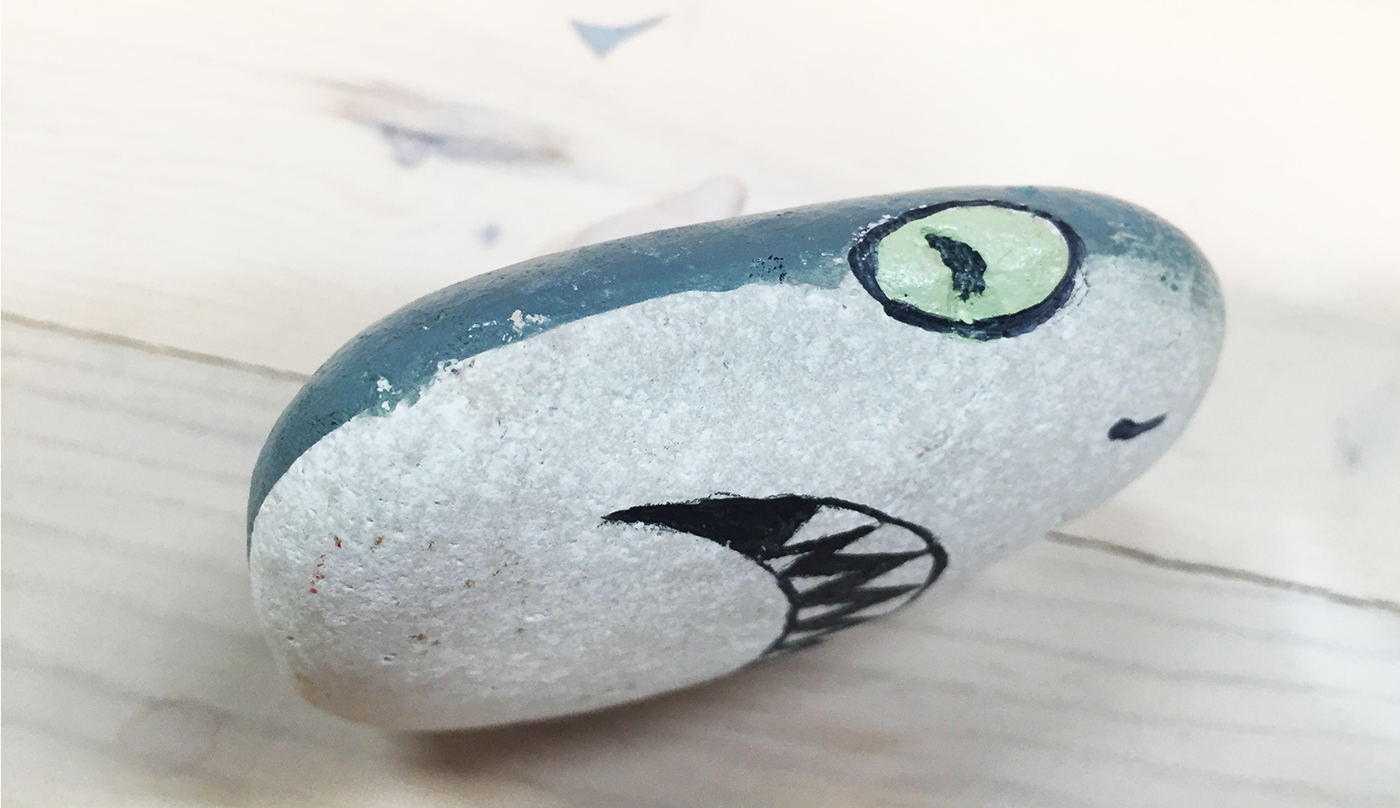
ROCK PAINTING PROJECT


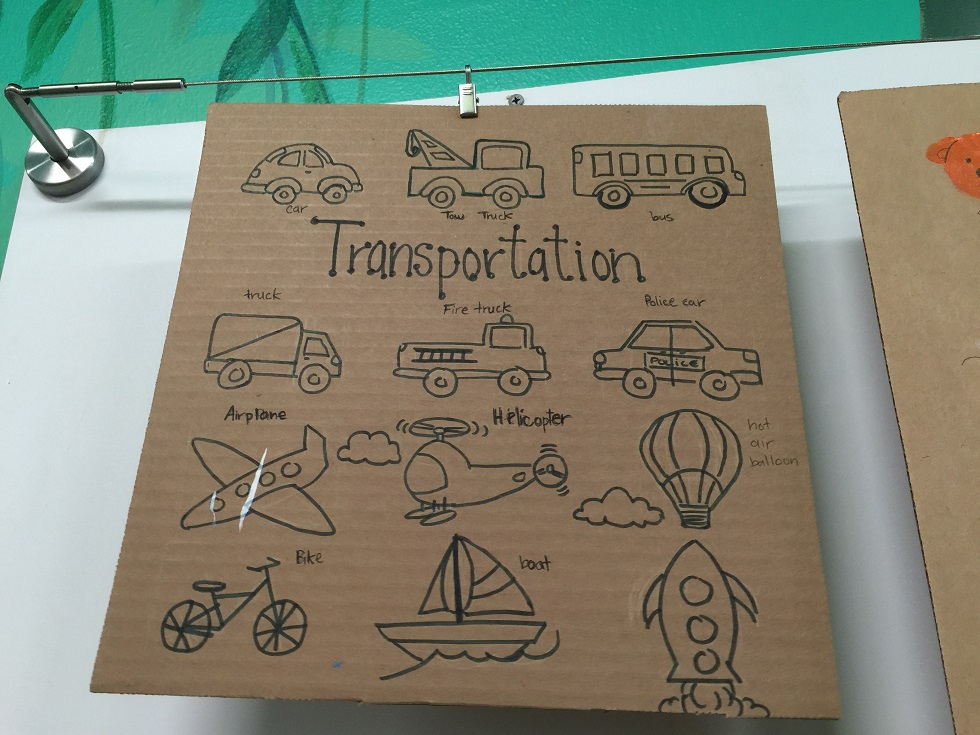
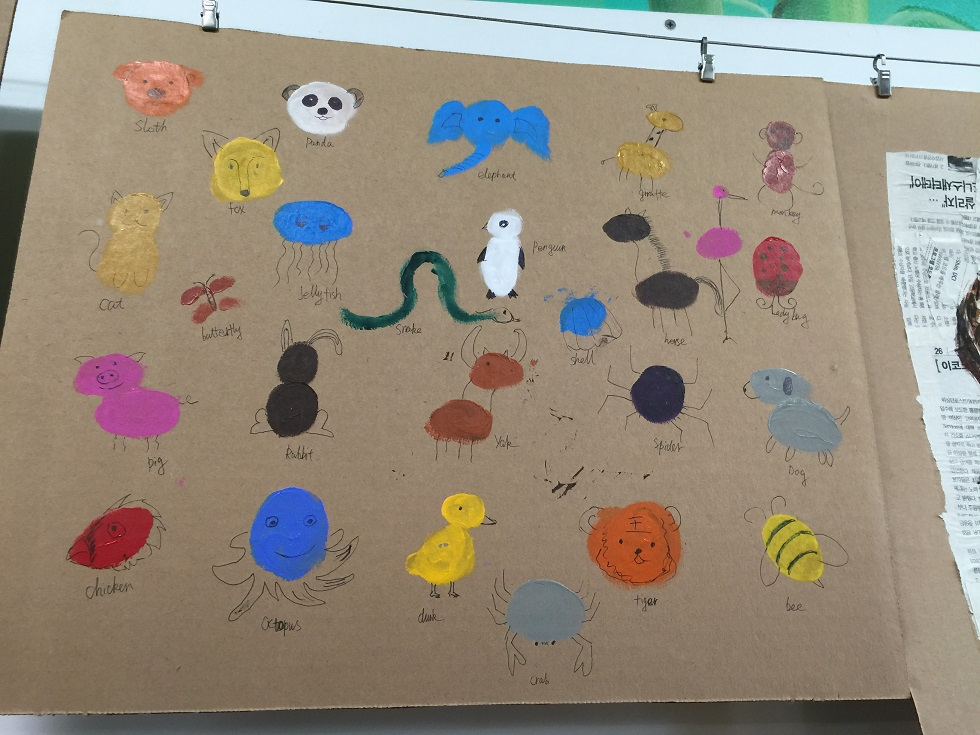
Basic Drawing Concepts
&
Beginning Drawing Projects


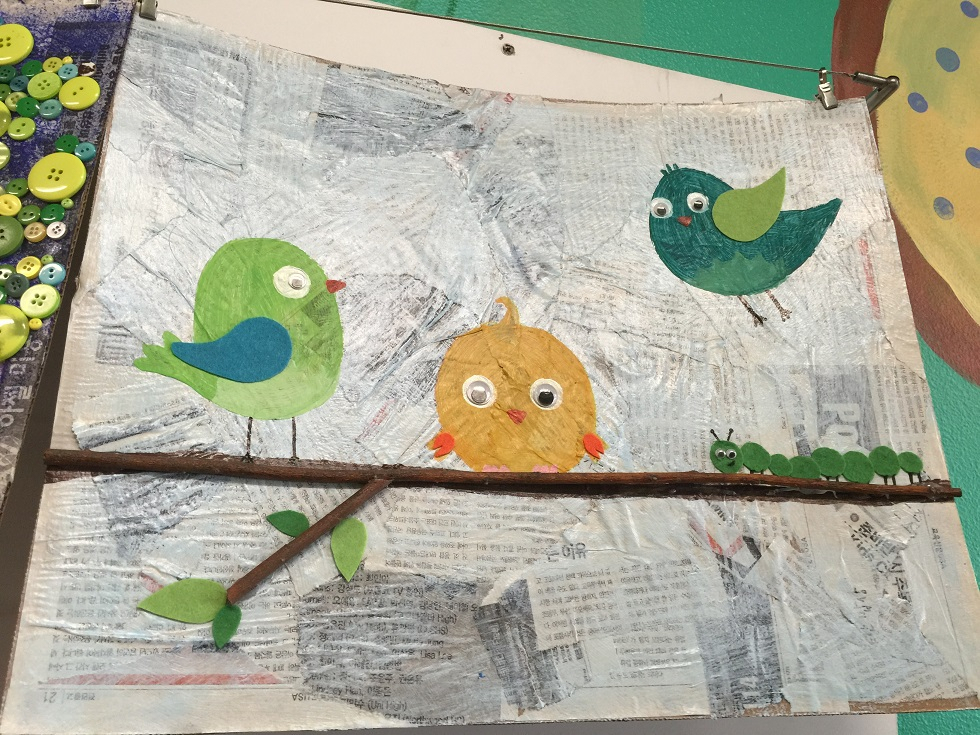
PAINTING & MIXED MEDIA PROJECTS

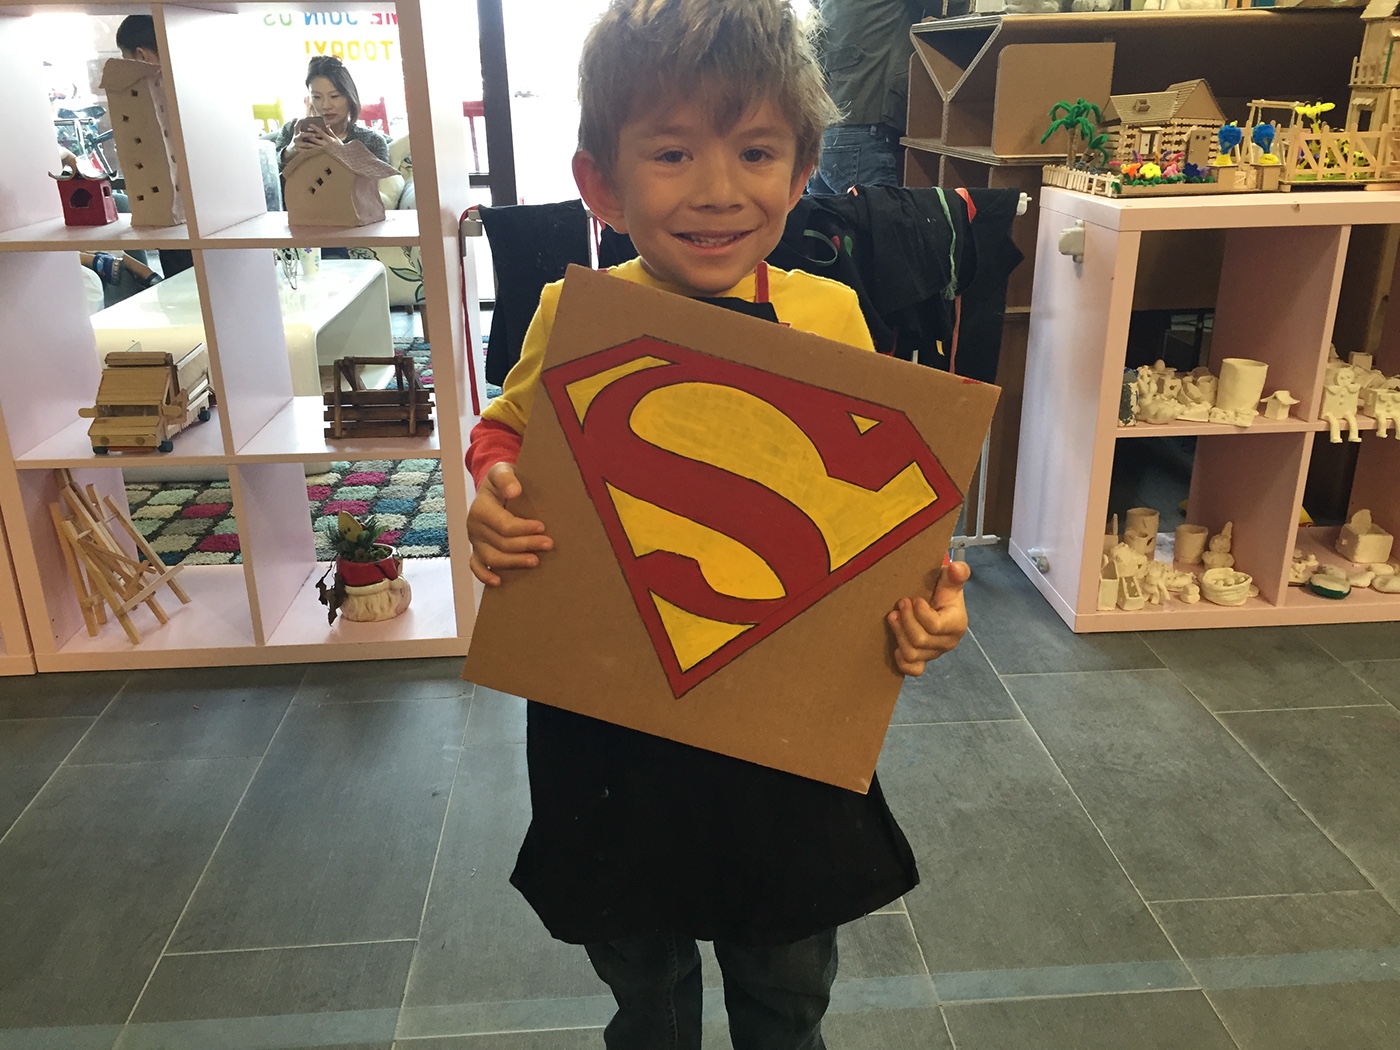


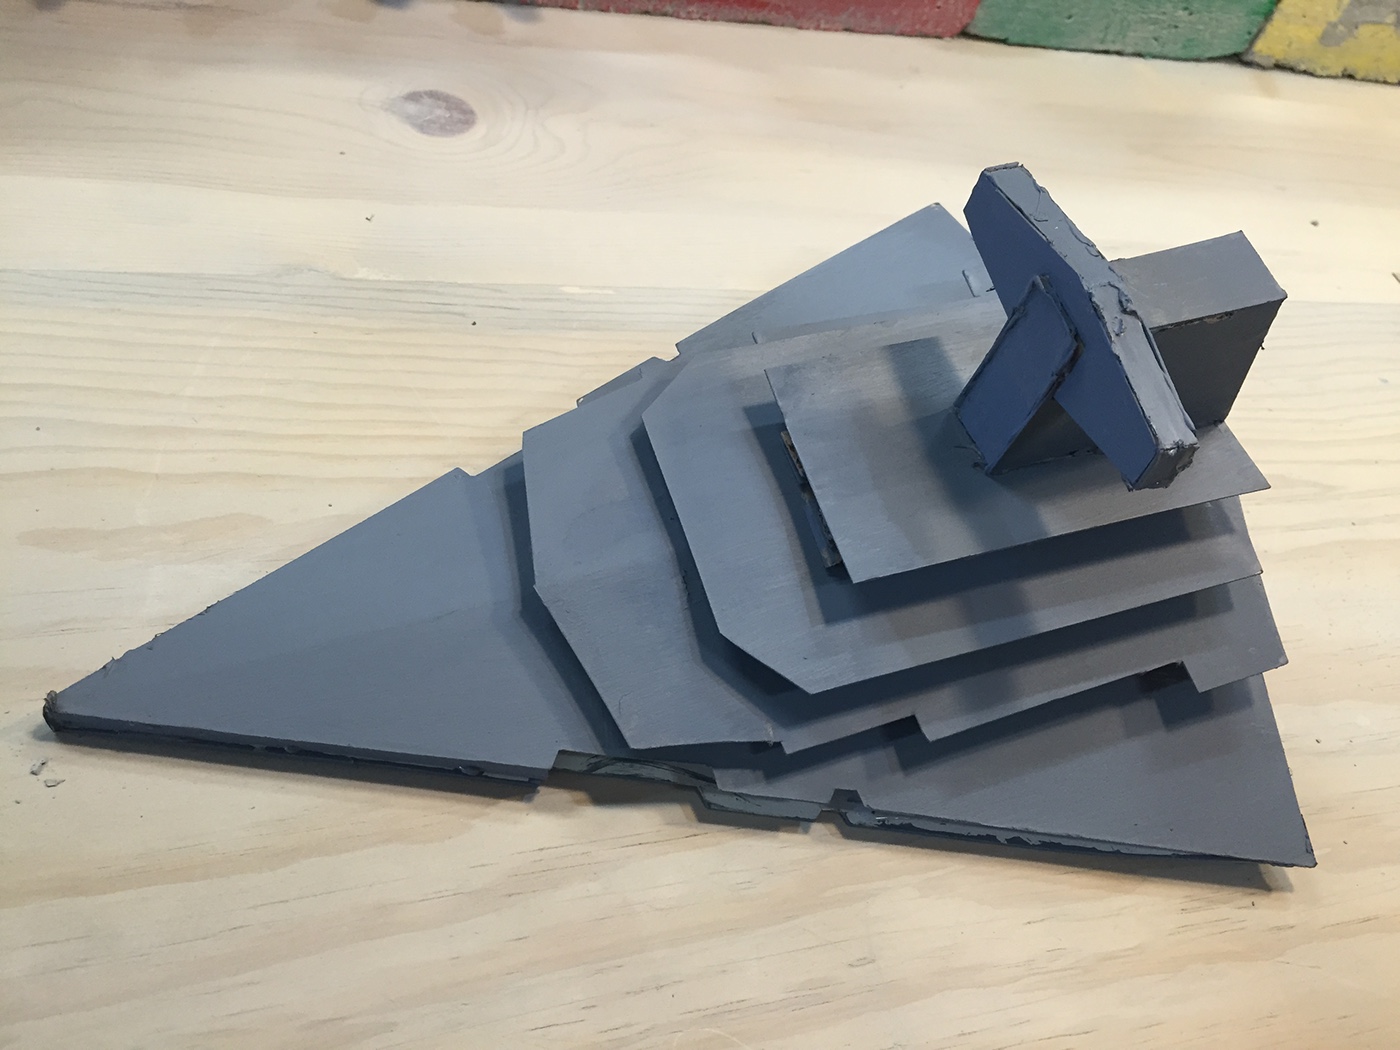
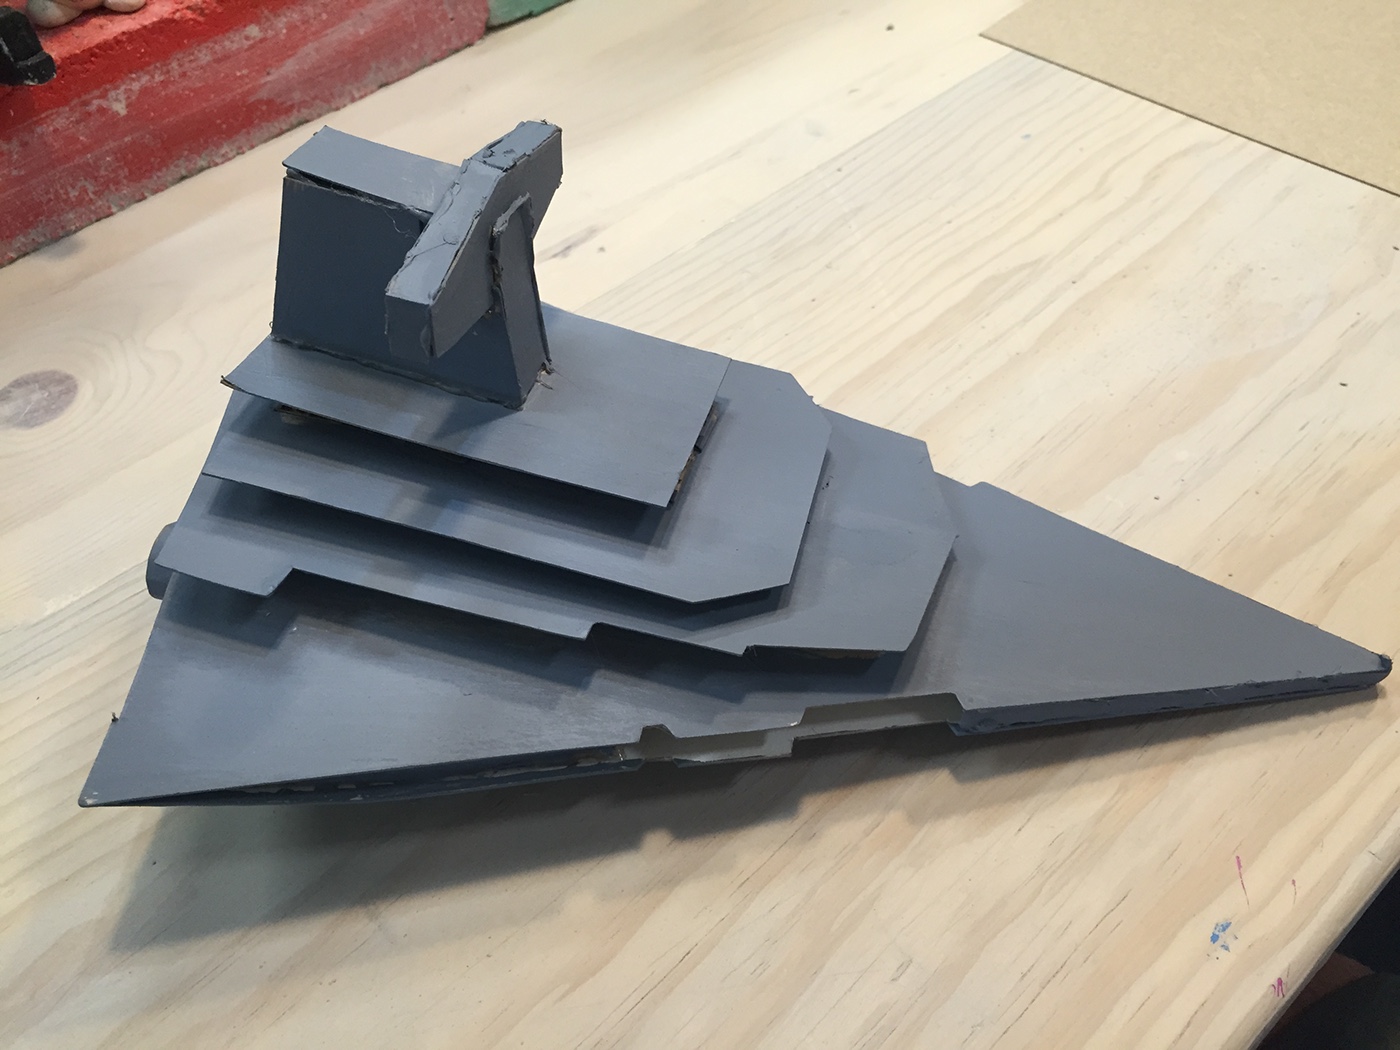
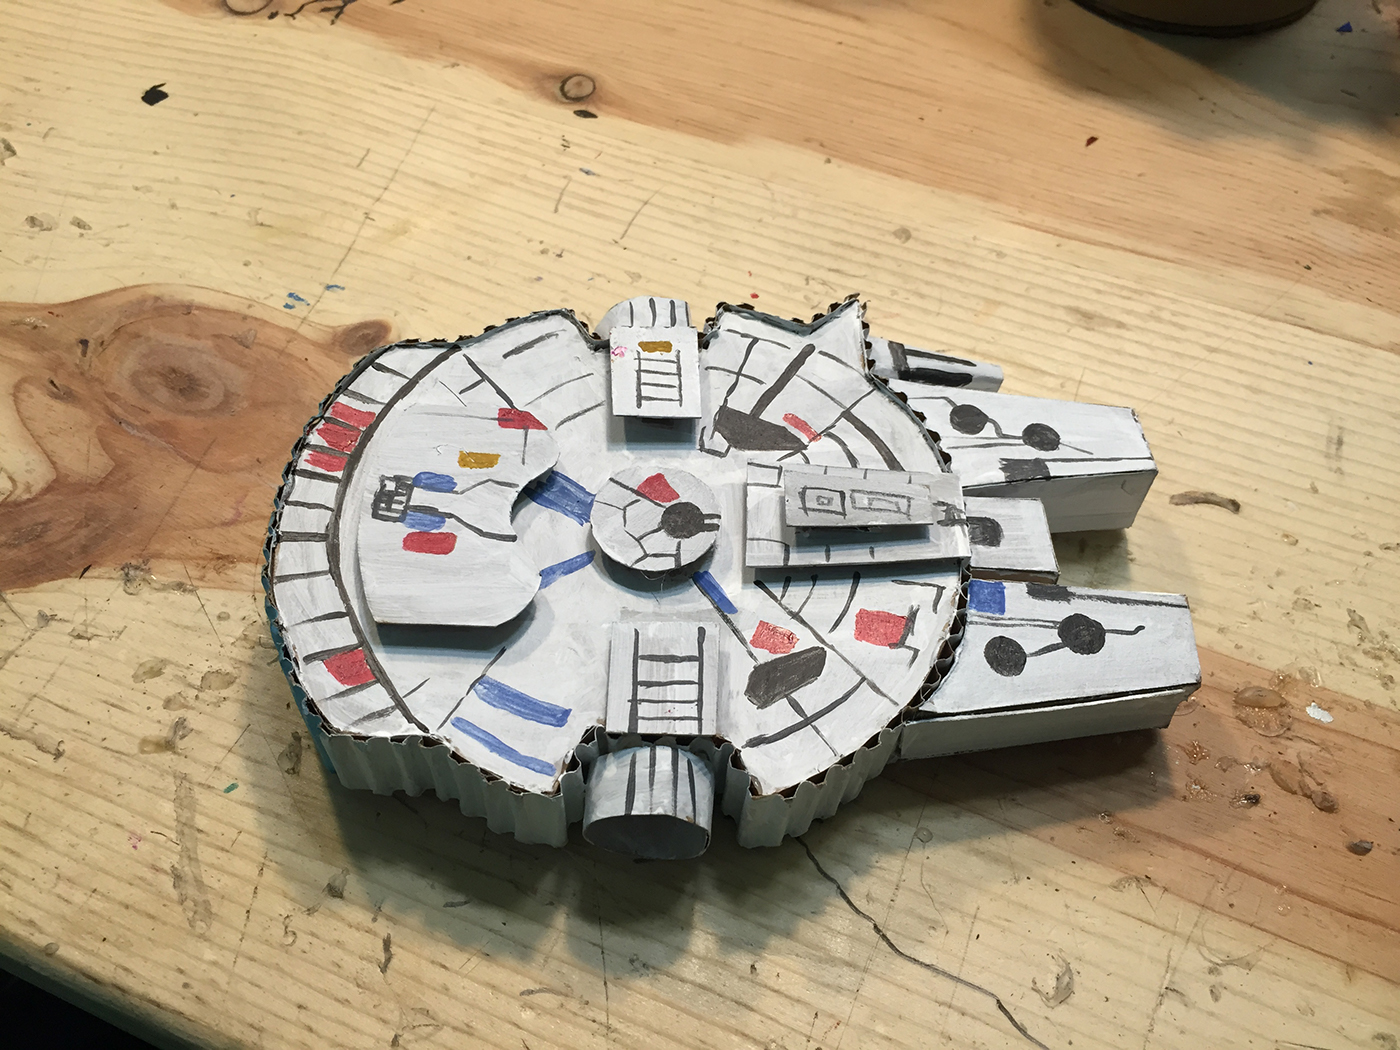
3D CARDBOARD PROJECTS
The cardboard projects all share the same if not a very similar process. First the side view and sometimes top view of all the necessary pieces of the piece(depending on the nature of the subject) is drawn on thick cardboard. Then they are cut out to create the stencils. Then thin cardboard is used by the young students (ages 4-9) to trace the all the needed shapes and then are connected by gluing them to a piece of corrugated cardboard. Then the students take their piece to the painting table and paint them. The students are given the choice of imitating the sample pieces, or they can choose to paint their own version.


Student sample based on original "T - REX" project.
POPSICLE STICK CONSTRUCTION PROJECTS